Bonjour mes amis !
I am super excited to be bringing you the new and improved Bijou Beret + Sewalong! This project can be either a super quick, palette cleansing sew OR it can be an easy going, slow sew. It all depends on what you are looking for!
I designed this project after making my first real coat, The Rumana! I had a bunch of large scrap wool left over that I wasn't sure what to do with. Some of those scrap pieces wound up being transformed into 2 ironing board covers plus a mini ironing board (the one you see in many of my sewalongs!), but I still found myself left with large scraps that I didn't know what to do with. I didn't want to just toss them, but I also couldn't figure out a fun project that they could be transformed into.
 This mini ironing board was inspired by @winmichele. I took an old cutting board that was no longer great for prepping food on and I stapled a layer of wool then a layer of linen fabric to create this portable sizes ironing board!
It wasn't until I realized when I started looking for berets to add to my wardrobe that I could potentially make one myself using those left over materials. I figured it couldn't be too difficult to put one together (right?), so I went off to research and experiment until I finally came to the project we are embarking on today :)
Are you excited to jump in and create your very own beret?
GATHERING SUPPLIES
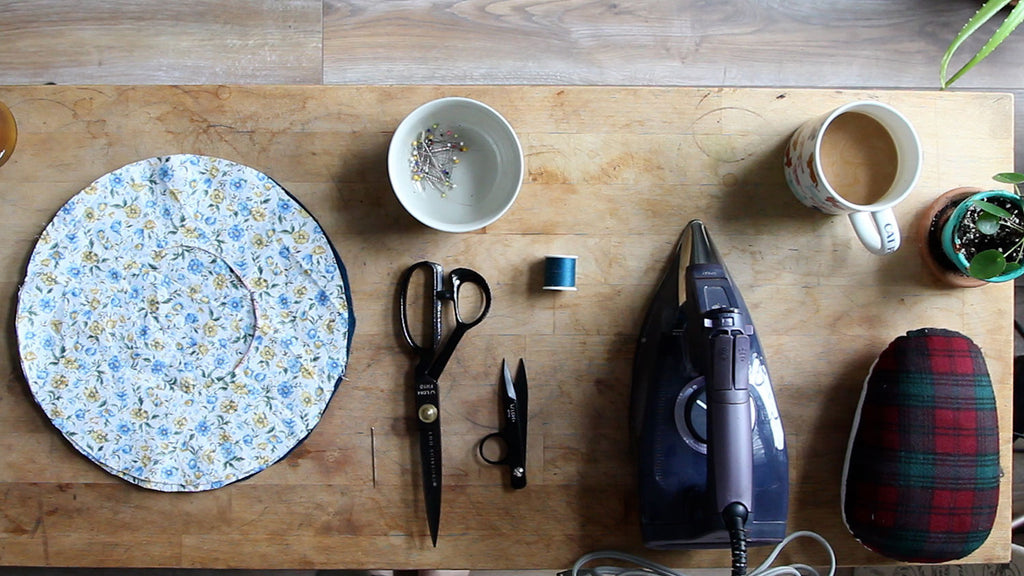
The first thing we need to do is gather up our supplies! You can either use your materials checklist on page 20 of your instruction booklet, or check the list below:
Beret Materials:
-
FREE Bijou Beret Sewing Pattern (Paperless Option Included)
-
A little less than 1/2 YD (0,5 Metres) of 45" wide Fabric + Lining
-
Pins
-
Fabric Scissors
-
Ruler
-
Marking Chalk, Pen or Pencil
-
Iron + Ironing Board
-
Ironing Ham (Optional)
-
Sewing Machine (Threaded with matching threads)
-
Hand Sewing Needle
-
Coffee or Tea for added comfort!
Embroidery Materials (This is optional and only necessary if you are embroidering your beret):
-
Embroidery Design (One is included in your Beret Download)
-
1-4 colors of embroidery floss
-
Embroidery Hoop
-
Embroidery Needle
-
Washable marking tool

Once you have all your supplies ready, we can dive in to our fun project!
Let's Get Started!
Just a quick note: This sewalong is made up of screen stills from the recorded sewalong that is premiering at World Frocktails on February 12th, 2021! In the recorded sewalong, I go into greater depth in assembling this pattern, especially with regards to the embroidered portions of the design. Embroidery is challenging to capture through imagery, but I try my best to share that information through pictures as well!
PDF ASSEMBLY
The first thing we need to do for this project is print and assemble your PDF pattern. If you have never worked with a PDF pattern before, check out this post where I take you step by step in assembling PDF patterns printed from home! The Bijou is the perfect pattern to try this process out with as it is only 4 pages, so it comes together super quick!
Once you have your pattern put together, go ahead and cut out your fabric according to each piece. If you would like to save paper, there is a Paperless Guide located inside your instruction booklet. It shares the measurements for drafting your beret directly onto your fabric.
EMBROIDERING YOUR BERET
Now, this part is totally optional, but I love adding a bit of whimsy to my designs, so I couldn't help but add an embroidered element to this pattern! If you aren't looking to embroider your beret, feel free to skip this section and jump straight to “SEWING YOUR BERET.”
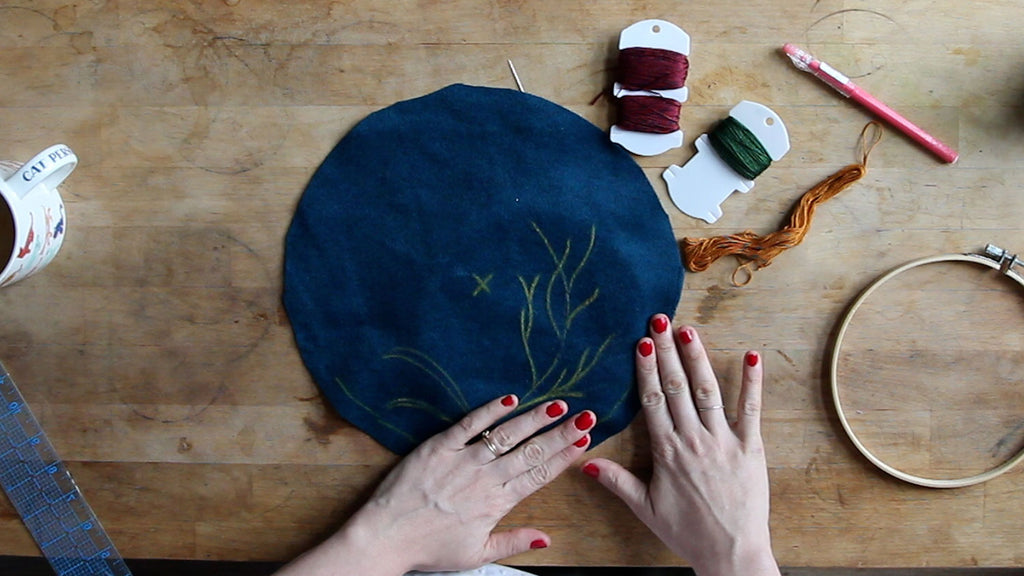
We are going to begin this project with our embroidery first! That way, all the loose threads and messy bits will be hidden on the inside of our finished berets. To start, pick a spot where you would like to add your embroidered design. Make sure you aren't too close to your seam allowance edge or the center of your beret where the stalk will eventually be sewn. I find it helpful to mark these two areas with a washable marking tool.


Next, lightly draw your embroidered design on to your beret. Depending on your marking tool, you may have to draw just the main outline portion (as I have done) of the design as the details can be too small for certain tools to handle. If you need help transferring your design (whether you are using the one provided or one you found online!), check out this awesome post by The Spruce Crafts !


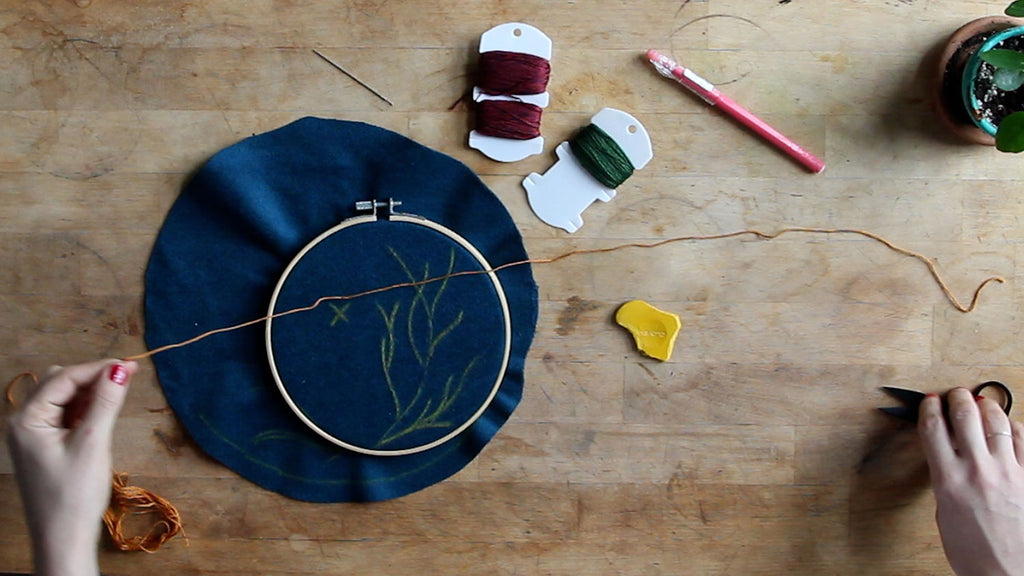
Once you have your design drawn, slide your fabric into your embroidery hoop, with the smaller hoop under your fabric and the larger hoop on top. Make sure your fabric is pulled nice and taut. This will ensure our embroidery doesn't cause our fabric to sag or pucker in odd places.


Next, cut a bit of embroidery floss the length of your arm.
Separate out 2- 3 threads from your current strand. This will allow your threads to be thin enough to go through your fabric but thick enough to show your design off beautifully!

Thread your embroidery floss through your needle and tie a knot at one end. Pick a spot to being your embroidery and off you go!


If you are following the embroidery pattern in the Bijou downloads, there are only three stitches you need to know how to do:
The Straight Stitch
This is probably the easiest of all the stitches to produce and the most familiar to sewists! To create this stitch, start by bringing your thread up through the back of your hoop.

Choose a spot 1/8”- 1/4” (0,3 - 0,6 cm) from where your thread has come up through the fabric and bring your needle + thread through to the back of your fabric.
You have successfully completed a straight stitch!

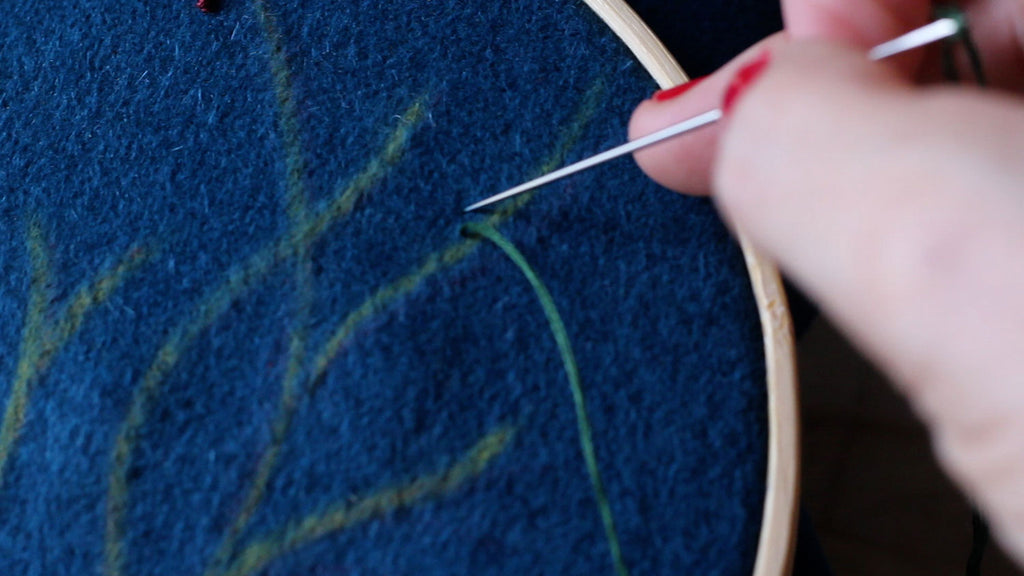
The Stem Stitch
This stitch is fun and creates a lovely organic shape, perfect for floral stems! Start your first line of stem stitches with a singular straight stitch.
This next bit is difficult to explain via text, so I will let the pictures below help to illustrate.

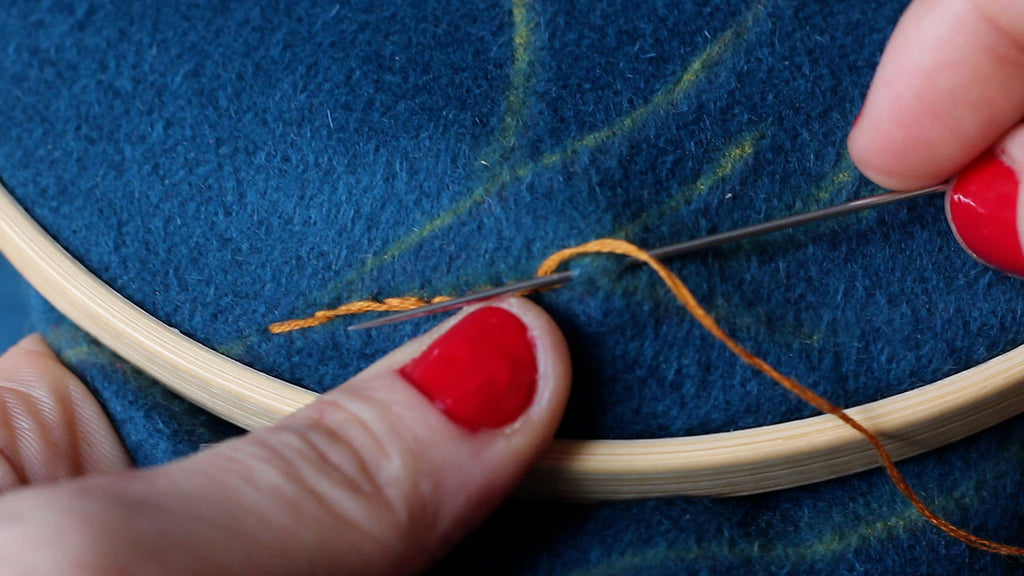


Continue this process until you have finished your line of stem stitching.
The French Knot
I have a real bias for French knots. They are simply mesmerizing to create! And the texture they lend to embroidery projects is just so fun!
To create your french knot, begin by bringing your needle + thread through the back of your fabric.

Twist your thread around your needle 2-3 times.


Gently pull your thread so that the different twists are sitting close to one another.

Slide your needle close to where you originally brought your thread through.


Gently pull your needle and thread towards the back of fabric, revealing a cute little French knot! 


Embroidery is a slow process, so feel free to take your time when going through this portion of your project! I personally love having an embroidery project to curl up with after having dinner. It's a really great way to keep your hands busy while enjoying a bit of television, and if you do a little each night, it will be completed in no time!

Once you have finished your embroidery, I think it's the perfect time to reward yourself with a bit of a break, especially if you just finished a large chunk of it! Feel free to get up and stretch, grab a drink of water, and maybe even a sweet treat for yourself! When you are all refreshed, we will jump right in to sewing up your beret!
Before jumping right into the sewing portion, be sure to removed your beret piece from your embroidery hoop and give it a little press!


SEWING YOUR BERET
If you are working with a non-wool fabric, or a fabric that doesn't hold it's shape very well, I suggest adding some interfacing to the wrong side of your main beret pieces before anything else. This will help to provide more structure for your beret and lend you it's classic shape.
Attaching the Stalk
The very first thing we will do to our beret is attach the stalk to the center of the upper cap! If you are working with a fabric that tends to fray, you will need to fold your stalk piece in half lengthwise, with right sides together (RST).
Sew along the long edge using 1/2” (1,3 cm) seam allowance.
Turn your little tube right side out using a safety pin and give it a press along the seam so that it lies flat.
Once you have your stalk prepped (All you need to do is cut out your stalk piece if you are using a non-fraying material), overlap the short edges of your stalk by 1/2” (1,3 cm). You should wind up with a mini circle!


Sew the two edges of your stalk together using a hand sewing needle + matching thread. Don't worry about being super duper perfect here with your stitches as this piece is so tiny and will be on top of your head, and who is gunna be up there looking at your work? Besides maybe a bird?

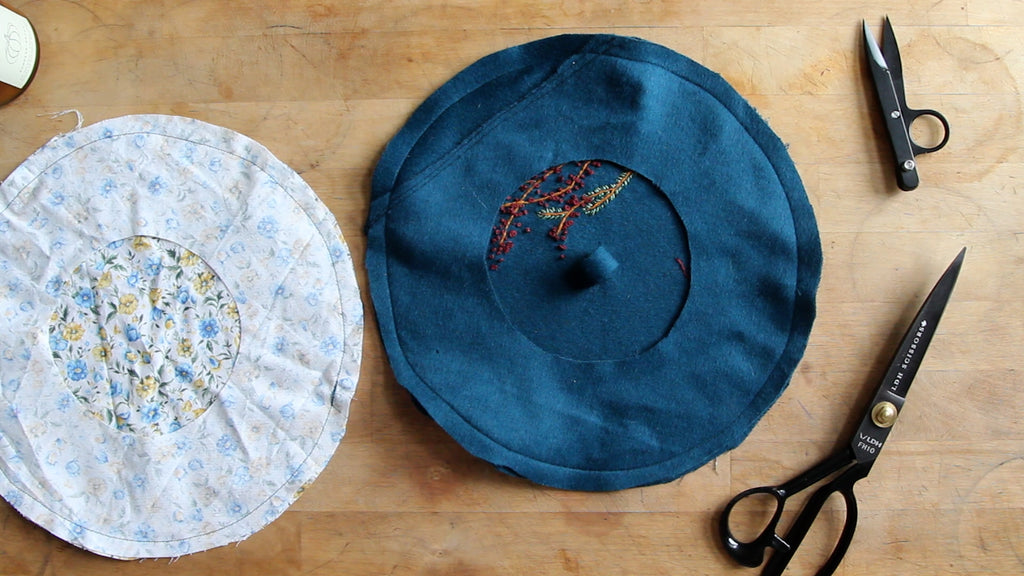
Once you have the two shorter edges of your stalk secured together, you can now sew it to the center of your upper cap. Sew it to your cap until it feels secure, kind of as if you were sewing on a button! Again, don't worry too much if your stitches aren't 100% perfect!


Attaching the Upper Cap to the Lower Cap
Next, we are going to get into sewing our actual beret pieces together! Lay your upper cap in front of you with the right side facing you. Then place your lower cap on top of your upper cap, RST.


Pin all around the sides of your cap.

Repeat with your lining.

Once your main fabric + lining fabrics have been properly pinned, sew each using a 1/2” (1,3 cm) seam allowance.
Trim your seam allowance in half on both your main beret and the beret lining.


Using a small pair of snips, clip into your seam all around your main beret piece as well as your lining piece. Make sure you are snipping too – not through – your seam allowance. Clipping your curve will allow your beret to have a smooth line all around the seam edge. Since traditional berets don't have this seam (as they are generally felted!), our job is to try and get that seam as inconspicuous as possible!


Pressing the Outer Seam
This next part is totally optional, but I have found it lends a very professional look to the finished beret in that it gives the seam the smoothest possible finish.
With the wrong side facing you, place an ironing ham inside of your beret and spread the outer seam over the ham. Press your seam allowances open.


This is a tedious process, so take your time and feel free to take as many breaks as you need!
Whew, once that is all done with, give yourself a mini-high five! There are only, like, two more seams and then you are DONE!
Attaching the Main Fabric + Lining Together
Flip your main beret to the right side.


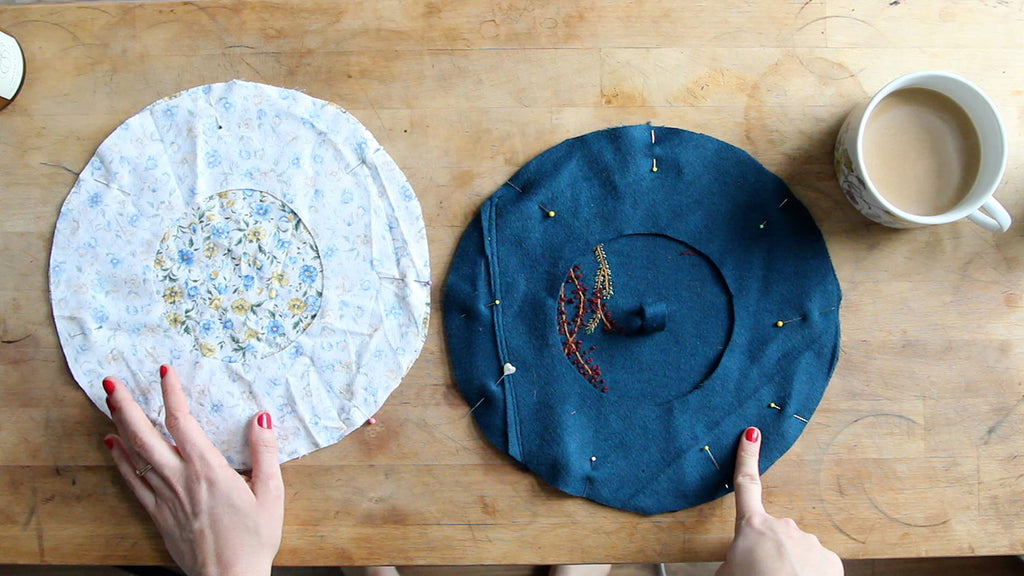
Then, slip your main beret through the beret lining's smaller circle.


Match up the smaller circle of your main beret and beret lining with one another and pin all the way around.

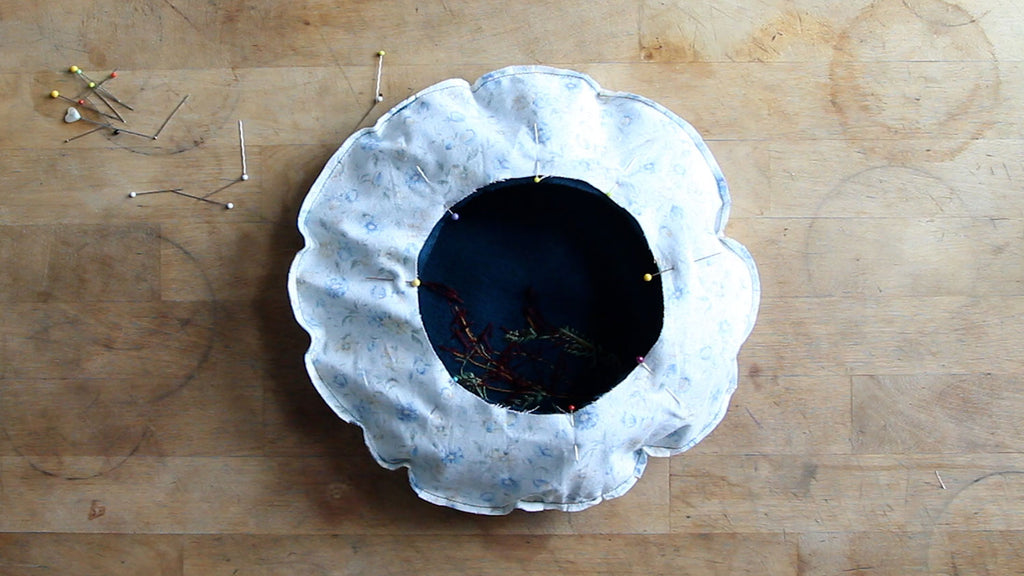
Before sewing your two beret pieces together, mark an opening approximately 2-3” ( 5 – 7,6 cm) wide. This is where you will NOT sew. This opening will allow you to flip your beret to the right side, kind of like when sewing a pillow.


Sew along the inner circle using a 1/2” (1,3 cm) seam allowance.

Clip your inner circle.

Flip your beret through the little opening. Take your time here as it can be quite a bit of fabric, especially if you used a sturdy wool!


Finishing Touches
Now all that is left to do is close up your little opening and give your beret a final press! To close up the opening of your beret, you can either sew a small line of stitches using your machine OR whip-stitch it closed for an invisible finish!


Finally, give your beret a final press. As you go along the outer edge, “roll” the seam allowance with your fingers so that you are pressing it as close to the stitch line as possible.

Et Voila! You have successfully created your very own Bijou Beret! Time to celebrate with a yummy cafe au lait!


I hope you enjoyed working on this project with me – I personally had a blast! If you would like to sharey our projects with me, feel free to tag me on Instagram at @untitledthoughts, or by using the hashtag #UTBijouBeret. Until next time – Bonne Couture!