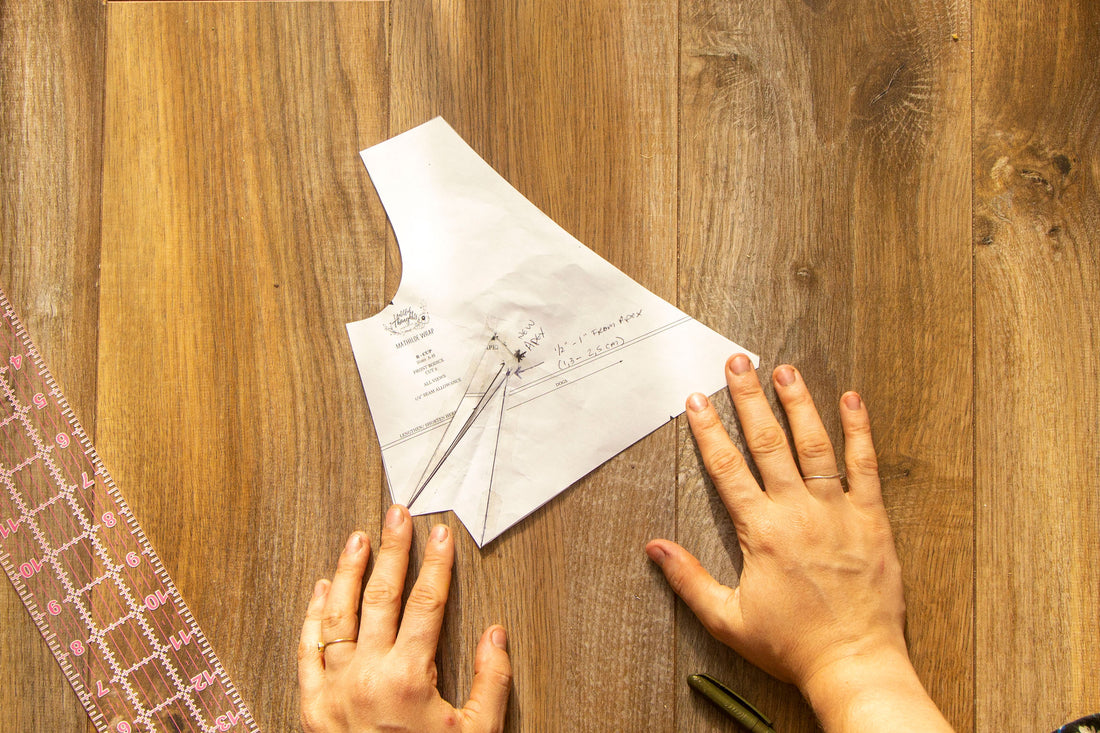
There isn’t much info out there regarding the French Dart. Aside from how to transfer a basic dart to another part of your pattern, and the notion that French Darts are elongated darts that come from the waist point, it’s a real challenge to find other information on the web about these marvelous creatures.
One of the parts of french darts that I find a tad confusing revolve around altering the apex point. I mean… how does one go about doing that? The process can’t be the same as moving an underarm dart as that requires cutting out your dart and apex point, shifting it up or down, and then grading your pattern back together. If you did that with a french dart, all sorts of things could go out of whack!
This was exactly the issue I found when re-drafting the Mathilde Wrap dress. As much as I LOVE a French Dart, they can sometimes be a real pain in the butt to work on from an alteration standpoint. So today, I thought I would show you one way I have found to be helpful in transferring your apex point to a new position when a French Dart is involved!
Let’s Get Started!
For today’s post, I will be using a mini version of the Mathilde Dress Bodice to demonstrate how to adjust the apex point for your garment.
Full disclosure - I am no expert on moving the apex point in a bust dart. I had trouble finding anything online that talked specifically about moving a French Dart’s Apex point. I literally just sat with this conundrum and the solution I came up with is something that makes sense to me based on my own sewing experiences. However, if you have a better or different or interesting suggestion for how to go about moving your apex point for French Darts specifically, I would LOVE to hear about it!
The first thing we are going to do is to connect our dart legs directly to the apex point.


Before we start changing things around, it is important to mark your new apex point. This new point will be the one that matches your unique figure. Don’t know how to find your apex point or need a refresher on locating it? Check out this handy, in-depth tutorial by Aneka from Made-to-Sew!

Once you have your apex point marked (brightly and boldly!), we need to close our dart. We want to make sure we are closing the dart all the way through the apex point, since this is the part that will be moving. If your new apex point passes through your old dart, simply remark it so that it is visible once the old dart is closed.


Alright, we are nearly done (super quick, right?!). As best as you can, mark a line from the original dart legs to your new apex point.


Cut along this new line and spread your pattern until it is lying flat. You may find that you need to make additional cuts around your apex to ensure that your pattern is lying flat.


Tape a bit of paper underneath your pattern as we need to redraw your new dart!

Mark a line halfway between your new dart legs (the bit that separated once you slashed your new line open). Connect this line to your apex.
Depending on your preference and bust size, you will want to mark a point anywhere from ½” - 1” (1,3 - 2,5 cm) from your apex along the line you just drew.
 I forgot to mark the center line. Whoops!
This will be your new dart point!
Connect your dart legs to your new dart point.


Finally, close your dart once more, this time closing only the dart (don’t go all the way to the apex).


Trim your excess paper from the bottom edge of your bodice pattern.


Remove your tape and flatten out your pattern to reveal *drumroll please!* your brand new pattern! YAY!


I hope this tutorial has helped you out a bit, especially if you are like me and felt overwhelmed by adjusting the apex point of such an interesting dart! I'd love to hear how shifting things around worked for you- feel free to leave your experience in the comments below!


2 comments
This was brilliant. Can’t wait to try it out tomorrow.
OMG thank you so much for this! I was having a hard time wrapping my brain around the same issue and now I don’t have to re-invent the wheel.
Thank you!!!