
Inserting an invisible zipper seems to be one of the most daunting tasks to new sewists. Heck, I avoided inserting invisible zippers for YEARS because I just couldn't seem to get things to line up just right (I added a LOT of bows to my puckering zipper ends!), and I just never could manage to get close enough to the zipper with my machine to warrant calling it "invisible."
But inserting an invisible zipper doesn't have to be painful or arduous, and you don;t need a special invisible zipper foot to get really awesome, consistently close stitches! Let me help save you some headache (and heartache) and show you how I manage to make my normal zipper foot work just as well as my invisible zipper foot!
Now, there are two types of feet meant to insert zippers. At least, I think there are only two types of feet- who knows! With sewing it seems like there are special attachments for every. Single. Seam.

You've got your standard zipper foot which looks like this:

Generally, you will receive one of these bad boys with the purchase of your machine. I don't think I've every bought a machine that didn't come with one.
The little grooves on each side allow you to change your needle position depending on which side your zipper teeth happen to fall on when you are sewing (left vs right). I love using this foot and have used it for YEARS. It wasn't until earlier this year that I even purchased an invisible zipper foot for my Janome.
I will warn you, though- it is incredibly easy to get your fingers VERRRY close to the needle with this foot. The only two times (yep TWO) I have ever sewn through my finger (You read that right- went straight through the nail and all), it was because I was using a regular zipper foot.
I don't say this to scare you, I swear! I just want you to be a bit more cautious when utilizing this particular foot as I value everyone's fingers- sewing becomes increasingly difficult if you injure your hands!
Then there is the invisible zipper foot which looks like this:

This foot also has two grooves on each side for your zipper teeth to slide in to easily. The grooves are on the underside of this foot, instead of on the sides like the regular zipper foot.
Now, I cannot deny that using an invisible zipper foot is 1000X easier than a regular zipper foot. The way the foot is designed allows your needle to get incredibly close to the zipper teeth when sewing, without fear that you might accidentally sew over the teeth. Plus it requires much less prep than a regular zipper foot.
But, it's also a specialty foot and can cost a bit of $$ depending on your machine, and not everyone who sews might have that kind of spare cash. That's why I want to show you how to sew with EITHER of these feet to achieve the same kind of results!
Let's start with the regular zipper foot, since it is the more accessible foot of the two.

Grab your invisible zipper and unzip it. Then flip it so that the wrong side of the teeth are facing you and the zipper head is faced downwards.

If you run your hands along the zipper tape and teeth, you will notice that the teeth sort of curl inwards. This is what makes an invisible zipper, well, invisible! The teeth hide themselves towards your inner seams so when you zip up your garment, it looks like nothing but magic is what got you in and out of your outfit!

With an iron set to a low, dry setting, we are going to iron our teeth open. I know that probably sounds counter-intuitive to what I was just talking about above, but trust me- it is much easier to get your stitches close to the zipper teeth if the zipper teeth aren't actually in the way of your needle!

The reason you want to iron on a low, dry setting is because invisible zippers are typically made of plastic. If your heat setting is too high, you run the risk of melting your zipper teeth, rendering them unusable.
Of course, I am super impatient and will use both a high heat and steam option every time I iron my zippers. But I also get a weird euphoric feeling knowing that I am playing Russian Roulette with each of my zippers, which is probably not the best of my sewing qualities.
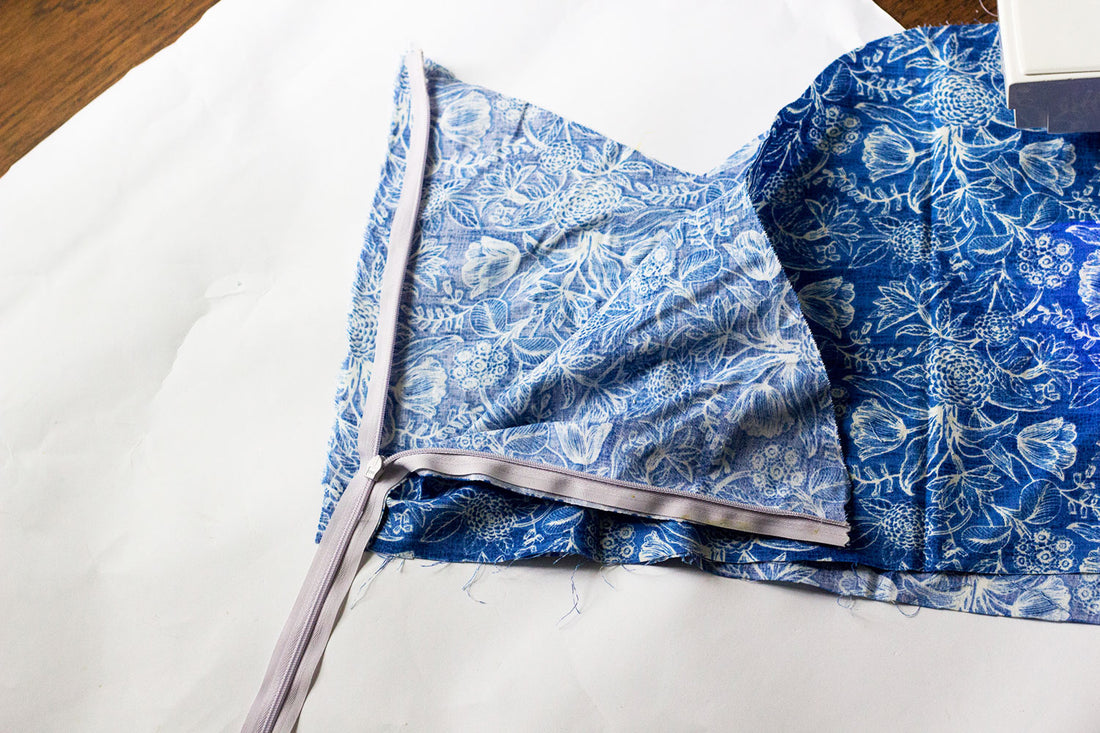
Once your zipper is nice and ironed, we need to line up the non-toothed edge of the zipper tape with the raw edge of whatever project you are working on. I happen to have a scrap piece of fabric that I will be demonstrating on.
Make sure that you are putting the RIGHT side of the zipper tape against the RIGHT side of your fabric (I didn't look carefully at my scrap and have attached my zipper to the wrong side, but oh well! As long as I do the same to the other side, only you and I will know that!)

Make sure that your zipper head is touching the RIGHT side of your fabric.


Now, when I am pinning my zippers down, I pin in such a way that my pins act as a teeth flattener. I try to utilize all of my tools to make this process as easy as possible, and I have sewn through enough zipper teeth to now know that if I flatten the crud out of them with irons and pins, the sewing experience will go along much more smoothly.


Now comes the sewing!
You'll want to put your foot on the machine to line up with whichever side of the zipper you are working on. For me, that is the left side of my zipper, so I am going to set up my foot on the left side as well.

Personally, I like setting my needle all the way to one side or the other (in this case all the way to the left) and I use the back edge of my zipper foot as a guide along the zipper teeth. I have found that this produces the closest sew to the teeth without accidentally sewing over them!


Every machine is a bit different, though, so feel free to experiment and see what is most comfortable for you!
And here is the finished result!


It doesn't look too bad all zipped up, does it?

Yay! Now I am going to do the OTHER side of the zipper with my invisible zipper foot.
One of the biggest parts of sewing in zippers that I ALWAYS mess up on is laying the second half of the zipper in the correct place. I have totally twisted my zipper in a way that made my garment a spiraling mess, or I've simply sewn the teeth towards the inside of my garment.
The only advice I can give for sewing the second side of your zipper in properly is to GO SLOW and check like.... 5 times to make sure it's on correctly before sewing it down! And when in doubt, baste it in place first. I wonder why doing the second side of something is always more challenging than the first....

A good rule of thumb is to remember that your zipper head should be touching the RIGHT side of your fabric (ignore the fact that I did everything backwards on my scraps!), and the zipper tape sans teeth edge should be lined up against the raw edge of your project.


I am sure you have noticed that I have not taken any additional steps to prep my zipper. With an invisible zipper foot, you don't *really* have to iron your zipper or pin it in a special way as the foot itself does a lot of the work for you. Or at least that has been my personal experience!
You will, however, have to move your needle back to a normal position. For me, when working on the left hand side of my garment (which is how I almost always put in my zippers- another preference of mine) my needle position needs to be directly in the center of the foot, which works out to be 3.5.
 My needle would break immediately (and it did!) if I kept it right at the 0.0 position.
 My needle would break immediately (and it did!) if I kept it right at the 0.0 position.

Starting at the bottom of your zipper is easier with an invisible zipper foot since there is no little plastic stopper to try to get over. If you starting at the top end of your zipper, simply lower your foot and slowly walk your stitches until you clear the plastic stopper. Then its full speed ahead!
I started at the bottom, so all I needed to do was position my zipper teeth inside the left handed groove of my invisible zipper foot. And then I just started sewing!


Voila! Now I have completed both sides of my zipper. Can you tell which was sewn on which foot? Cause I can't!


Feel free to drop in any of your own personal successes (or failures) with sewing invisible zippers! I hope that this short tutorial helped ease the burden of sewing zips so that you can get on to enjoying your precious #MeMades!
1 comment
This was very useful, especially the part where you indicated that you use the pins to flatten the teeth of the zipper. I keep stitching my zipper’s teeth when using the invisible zipper foot, and I think that this might be why. The teeth of the zipper are curling inwards, and then I have to take out my little tool of destruction and patience (which is on low supply) and take everything apart again.
Kind regards,
Zandri