
Today is the final day we will be working with our bodice before setting it aside to work on the skirt portion of the Mathilde. Are you excited?
This is the part where you have the option to use the neck binding pattern piece to create a matching binding for your neckline
OR
You can use a pre-made bias binding and skip the next few steps to get right
into attaching your neck binding to your bodice!
If you are making your binding from scratch, you’ll want to go ahead and grab your neck binding piece and bring it over to your ironing board. I have even put together a quick blog post on creating your own bias tape from scratch!
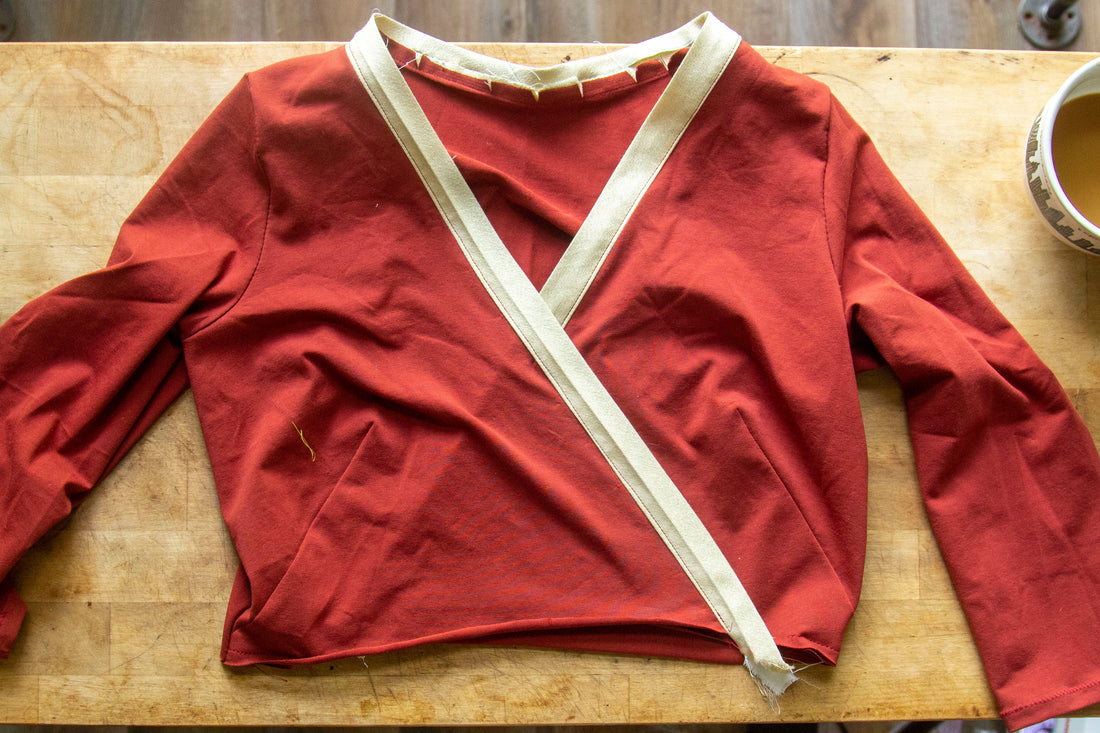
Once you have your bias tape ready, you are going to open up one side of your freshly pressed binding and line up the raw edge of it to the raw edge of your neck opening.

Starting from one of your front bodices at the waist, pin your binding into place, all the way up the front neckline, around the back neckline, and back down the second front neckline. Make sure you aren’t stretching your binding or neckline as you go.
Optional: If you want to add more structure and long term stability to your neckline to keep it from stretching out over time, you can add a strip of twill tape or clear elastic to your binding on the inside right along the creased edge!

 I used scrap strips of muslin cut on the straight grain as my "twill" tape.


Sew along the creased line using a straight stitch to attach your binding to your neckline.
Press your seam allowance back in towards the center of the neck binding and then understitch. (If you need more guidance on understiching, check out my Quick Guide to Understitching blog post!).


Grade your seams to help eliminate some of the excess bulk (especially if
you added your optional twill tape!).

You might also want to consider clipping around the curved edges of your neckline. This will allow your bias tape to stretch a little bit easier along the trickiest parts of your neckband in the next steps.


Now, press your entire neckband towards the inside of your bodice, pinning it in place as you go. The back neckline may need a bit of maneuvering to get everything to lie smoothly, so take your time and don’t be afraid to use a LOT of pins!


Stitch along the outer creased edge of your binding using a semi-long (3.0) straight stitch.

Give your neck opening one final press and VOILA!


You have successfully completed your bodice! Woohoo- feel free to set it aside for now while we move on to tackling your garment from the waistband down in Part 4 - Waistband + Ties.