
Last week, I managed to finish digging out the wildlife pond (yay!) and after a quick break from working on the pond over the weekend (aside from purchasing some materials), I am ready to tackle the next steps this week! Which is exactly what I did and oh. my. goodness!! So much has gotten done, I could just pinch myself! Wanna see?
Underlayment + Retaining Wall
Today was a quick and easy day that also turned out to be a lot of fun! To start, I began the day by laying out an underlayment for the pond. An underlayment is basically a layer that sits between the pond liner and the bare earth. This extra layer is meant to help protect your pond liner from getting holes torn into it from sharp rocks, plant roots, etc.
I wound up not using a traditional underlayment for this pond and instead opted to use two layers of weed suppressing fabric. The reasons for this were:
- My soil is really soft and primarily composed of clay, making it less likely to cause damage to the pool liner.
- There were no obvious rocks where I dug and there were few (less than 5) roots I had to pull up from the pond area, again, making this a spot where things are less likely to damage the pool liner.
- The weed suppressant fabric is really heavy duty. I mean, super heavy duty in that even scissors seemed to have a hard time cutting through it, much less roots from plants, which I can attest to because.....
- I already had this material on hand! I pulled it up from my front and side gardens earlier this year and wanted to find a way to repurpose it. This seemed like the perfect project.
For all of these reasons, I felt confident using the weed fabric in place of the traditional underlayment (which is a non-woven type felt from what I read online, which is also what my weed fabric happens to be).

With the underlayment in place (and the bags of rocks holding everything down for impending storms), the pond was starting to really come together and I couldn't wait to add the liner and begin filling it with rocks and water!
Since I couldn't add the liner quite yet (I was still waiting for it to arrive in the mail which it did that very evening), I figured I would eagerly begin the retaining wall, just to make sure the base bricks were level and possibly pick up more if I needed them. Both of us really loved the look of stacked rock like this:

Image via PremierPond.Com
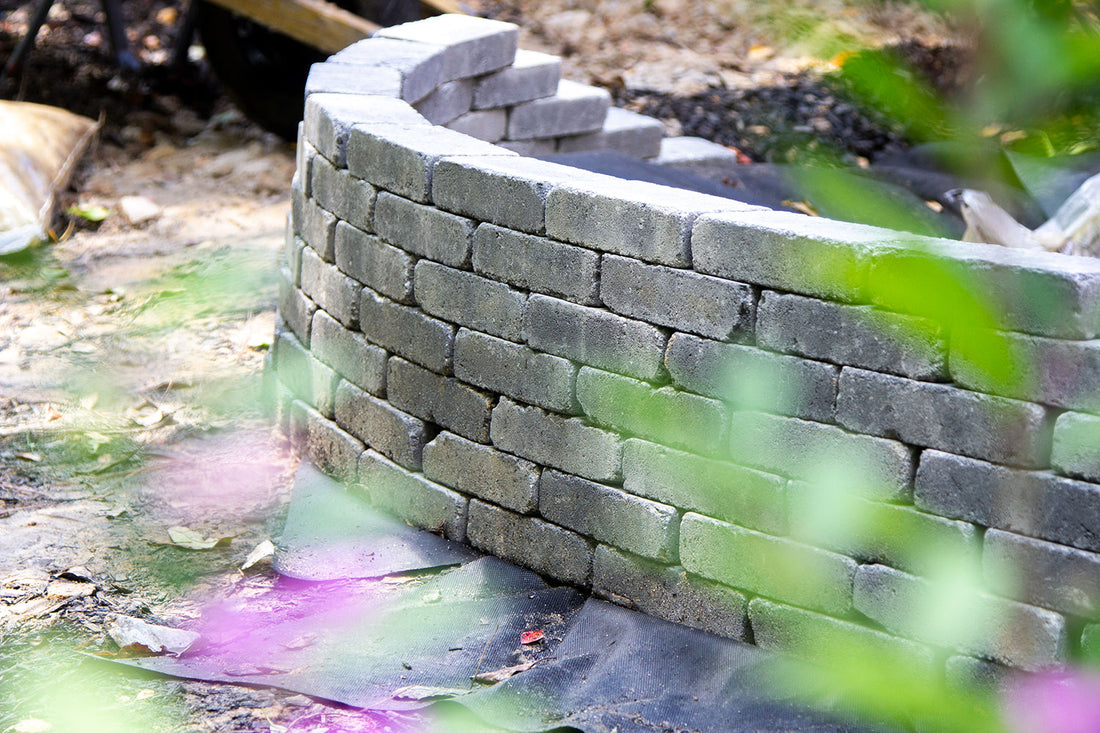
However, supplies such as this are limited and pricey near us. So instead, we opted for the next best thing -- beautiful thin grey bricks! Honestly, we both LOVE how these bricks curve against the edge of the pond, giving it the appearance of the side of a well. And once we have plants growing all around it, the entire space will feel simply magical!

To create the retaining wall, I simply place each brick and held it level. If the brick was sitting too high, I dug into the soil to get it flush with the other bricks. If it was a bit too low, I added clay soil that was dug out of the pond to stabilize it. I did this all the way from the start of the beach slope to the other. Then, I began adding bricks in rows that gradually grew shorter until the last row was just a bit higher than the slope of the beach.

That's when I realized I would need more bricks, so I stopped for the day and picked some up the next time I was out.
Waiting Out the Rain
I was super antsy to get back to work the very next day, especially since I had picked up the remaining bricks for the retaining wall AND the pond liner had been delivered before the end of the day. Instead, I was met with lots and lots of rain. Ah well! It was a good opportunity for me to get to preserving the loads of fresh veggies I had in the fridge instead.
Rubber Liner + Finishing the Wall
With the remaining bricks purchased, the rain finally done, and the rubber liner safely in my hands, it was finally time to start putting things together!
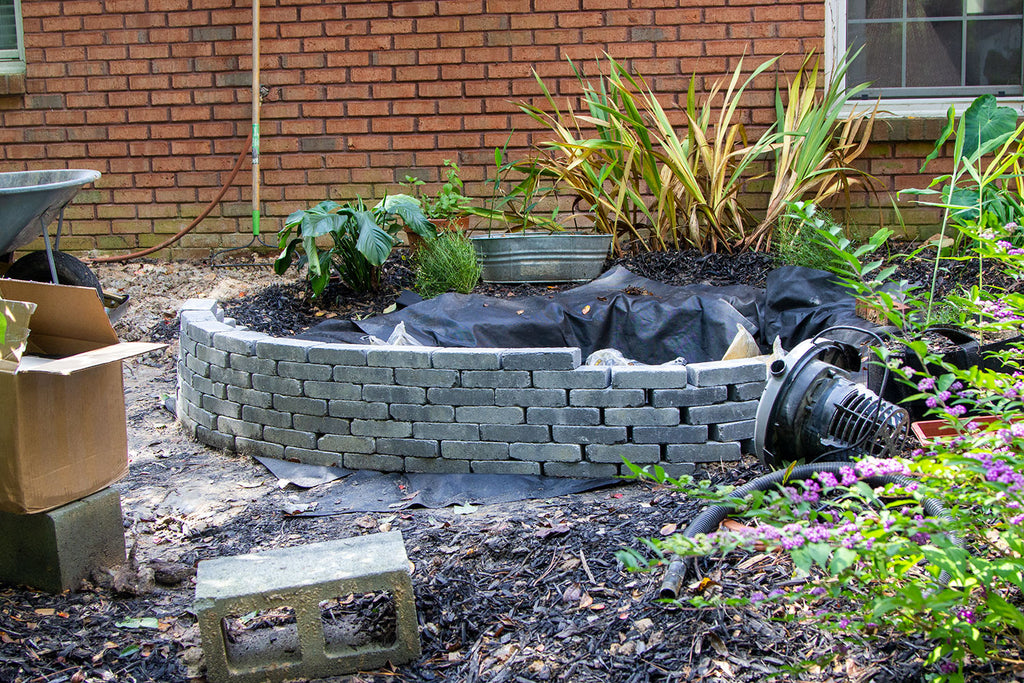
To start, I finished building the retaining wall. Once all the bricks were in place (and I had admired how pretty everything looked), I noticed that there was a rather significant gap between the soil mound and the bricks themselves. I filled this in with soft soil dug from the pond and packed it in tight so that everything felt secure.


I wanted to ensure that when the pond liner went in over top of this particular section, and rocks were sitting on everything, the liner itself didn't get punctured from the weight or dragged into this little pocket opening.
With the retaining wall pretty much complete (we wound up adjusting things as we continued building the pond), it was time to put in the liner.
Before moving on to laying the actual liner, I first had to remove the rainwater that had filled the lower level of the pond. If only this pond weren't so close to the house- I totally would have opted for a natural pond because this water remained around the same level for days (thanks super clayey soil!).

 In this small little section, I managed to suck out 20 gallons of water!
The reason I opted for a rubber liner over a vinyl was namely to do with longevity. Almost every blog post I read talked about how the cheaper vinyl liners wore out much more quickly than their rubber liner counterparts, and honestly the thought of having to drain an entire pond to replace a vinyl liner sounded so unappealing.
So, I spent a bit extra and purchased an EPDM pond liner. Based on the depth, width and length of my pond, I was supposed to purchase a 12" x 12" (30,5 cm x 30,5 cm) liner, but that wasn't an option anywhere. I had the choice between a 15" x 15" (38,1 cm x 38, 1 cm) liner or a 10" x 15" ( 25,4 cm x 38,1 cm) liner, with a $50 difference between the two sizes. Yikes!
I opted for the smaller and cheaper of the two liners, figuring that if it was too small, I would take away some of the retaining wall I had built up in dirt.
Thankfully, I managed to juuussssttt get the liner to fit! Whew! And it was pretty easy to kind of mash into place. I am not sure how others managed to get their liners to lie totally flat in certain areas without massive folds, but I wasn't able to do that. So I just kind of went with the folds, knowing that they would be hidden eventually by rocks and the like.


 Not going to lie, this part was way more fun than I had anticipated! It felt really good putting everything into place and I was surprised that I didn't need help adjusting the liner considering how freaking heavy it was.
With the pond liner in and the retaining wall built, I could now turn my attention to *slowly* lining the walls and floors with rocks.
Inner Walls, River Pebbles + Fish Cave
This is around the time things started falling apart for me. At least mentally. Everything worked out in the end, but I felt a lot of inner turmoil during this next go-round.
Originally, we had the idea to utilize large rocks that we already had found around our garden. Knowing that we didn't have enough of these to line all the walls of our pond, we came up with the idea to stack red bricks that we already had on hand up the walls of the pond. We thought that in doing so, it would give the whole pond a well sort of look.
Unfortunately, bricks are rectangular and the pond was cylindrical , so it quickly became apparent that the bricks weren't going to stack nicely or be stable enough to not worry about them toppling over ad potentially puncturing the liner or killing out future fish. To fix this, I thought that maybe by randomly placing the bricks along with the rocks, we could utilize both in a way that would actually work.
I was totally incorrect on that front. Instead of looking beautiful and organic and stacking really well, our pond started to look more like a construction site where all of the broken bricks and concrete had been thrown (not too far from the truth.)


"Of course!" I thought, "it looks like a mess because I mixed all these random colors together and it doesn't flow together from red to grey!" So I took everything out and started again, making sure to put all the greys near one another and then transition to the pinky-browns and reds.
Nope. This also didn't feel like it was working. It wasn't the color that was the issue but the material itself.


For one, many of our stones were rectangular in shape and didn't stack well. They also didn't feel like natural rocks. And then there was the whole thing of not having enough to complete the inside of the pond (who knew a pond would need so many stones!).
This is when things began unraveling for me. All of the little doubts about this project started creeping in and I felt totally defeated. I sat in the fish cave and cried, wondering why I even took on this project. Was it a total waste of time? Maybe I should just shovel all the soil back into place and stop trying to take on these wild ideas.
My inner perfectionist tendencies came out full force and I am so thankful that my husband was there to talk me out of the fish cave. After giving it some time, we both looked at a few different options for rocks that we could easily purchase and transport home and that wouldn't totally break the bank. And we found them, all at Home Depot. We have very limited options with our tiny two door car and Home Depot / Lowes are great for making multiple trips as we can't haul a huge amount at one time due to size + weight restrictions.
For the inner walls, we grabbed concrete retaining wall stones that had a more natural shape to them. We found these in two different sizes and three different colors. The floors and beach wound up being a mix of medium sized round river stones, brown river pebbles, and leftover marble chips we had on hand.

And for the fish cave, I wound up snagging a really large reddish-slab that wound up working perfectly (after my initial failed attempt at two rectangular slabs that were literally 1/2" (1,3 cm) too small.

Filling with Water
Finally, it was time to add water! This part was so exciting. Well, the third time around at least. The first one and a half times, we ended up with really murky water because of the residue on our rocks and had to drain the pond entirely until it finally ran clear.

Once it ran clear, however, the pond looked liked a literal dream! We were so giddy and felt incredibly accomplished.

I would like to note that the beach area that I spent so much time building up was originally supposed to be under a shallow layer of water. However, upon filling the pond I realized that although I had made sure that all the opposite sides of the pond were level to one another, I failed to make sure that the adjacent sides were also all level. This resulted in the left and right side of the pond being significantly lower than the front and back. Whoops! I will remember that for the next one I suppose!
All that we had left to do was to cut the liner and hide the remaining bits with rocks + mulch. We also chose to do a bit of decorating with some logs, broken pots, and extra large stones we happened to have.
Isn't the pond really starting to take shape? I can't wait to show you what we did in the final installment of this series in Part 3!
1 comment
Very helpful and reassuring information. I am travelling the journey right now and I can imagine me also sitting down in the middle of it all….wondering why!! 😂 So thank you for the reassurance and lovely description of the build process.