

The Amélie Dress is probably my most complex pattern, both in terms of technical sewing as well as in achieving the proper fit. I don't know why I thought creating an intermediate advanced level pattern as my first official pattern was a good idea... Honestly, I was just so in love with the design that I wanted to do everything I could to bring it to the world, and I am so glad I did, because this dress fulfills so many of my wardrobe dreams ❤️
You'd think that by designing my own pattern, I wouldn't have to do much altering to get the fit juussst right. If only! My upper torso is a mixed bag of measurements with my shoulders and bust and torso length all requiring different things from the garments I sew.
The Amélie is no different.
So, I thought that I would put together a little post on how I managed to fit the Amélie to myself quite nearly perfectly (yay!) with the hopes that by showing you my process that it might help you to fit the Amélie to your unique measurements. I know that I won't be able to go over every possible fit alteration for this dress, but hopefully by seeing what I do and how I address different issues that arise throughout the fitting process, you will feel ready to tackle your own fitting conundrums. With this dress or any other garment you might be working on!
Let's Get Started!
To start this whole process off, I looked at my measurements (B: 35" [88,9 cm], W: 28.5" [72,4 cm], H: 39" [99,1 cm]) and cut out a straight size E1, B-Cup Bodice with the Open Back. I chose an E1 because I know that my shoulders generally fit into this size and it also matches up with my waist and hip measurement most closely. I knew from past samples of the Amélie that I'd have a lot of excess in the bust area and that would be where I needed to focus my attention.
I went through all the motions of sewing up the entire bodice sans lining. I opted to use a bating stitch for all of my seams so that I could take my toile apart really quickly. And I actually wound up cutting my pieces out in a fabric I thought would make for a cute lining if I didn't have to make *too* many alterations.
I made it a point to stay stitch the necklines so that I had an idea of where those would hit me.

I even pressed back the upper waistband and open back seam allowances to give myself the full picture of what this might look like while I was wearing it.


Once everything had been sewn up, it was time to try on the first sample and get an idea of what might need changing. I have to say, taking remote images of myself in my mock-up proved incredibly helpful, especially when capturing the back of the garment. Usually, I struggle to see what changes need to be made when working with solely a mirror. If you can, try setting your phone on a timer to grab images of those harder to see areas when you are fitting yourself!


Please forgive my random assortment of bottom garments. I was generally in my PJs or wearing my husbands leggings while working on this project.
I immediately spotted some issues. Aside from the overall excess of fabric at the bust, I also found that I had some bagginess right near the armhole and excess fabric was bunching around the back of my bodice as well.
I've been asked a few times how I have gotten so good at fitting myself and my answer is always the same: lots and lots of pinning. It is my go-to solution when fitting myself. I simply pin until things start to look a bit better. That's exactly what I did here.
I started by removing the excess fabric between the two CF dart points.

then I did a quick "movement" check to make sure I still had a good range of motion. I do this throughout fitting myself as I never want to overfit a garment. There's got to be enough room to move and breathe and dance and eat!


This is when I noticed that I had some pulling happening at the shoulder seam as well. I decided to make a note of this, but not alter that part of the pattern just yet. I try not to make too many changes when fitting all at once because sometimes, I will fix one issue and in doing so, it corrects another problem for me in the process.

So I stuck to pinning the excess out from the back through to the front of my bodice as well as right under the arm.


Once everything was pinned, I changed and roughly marked my fabric with a Frixion pen at each of the pins.

I then connected all of those little dots with tailors chalk...

...and took my toile apart in order to transfer those markings onto my paper pattern, which gave me this:

Things were starting to look weird, but I knew to trust in the process. Pinning has never let me down, so I wasn't about to start doubting myself just yet.
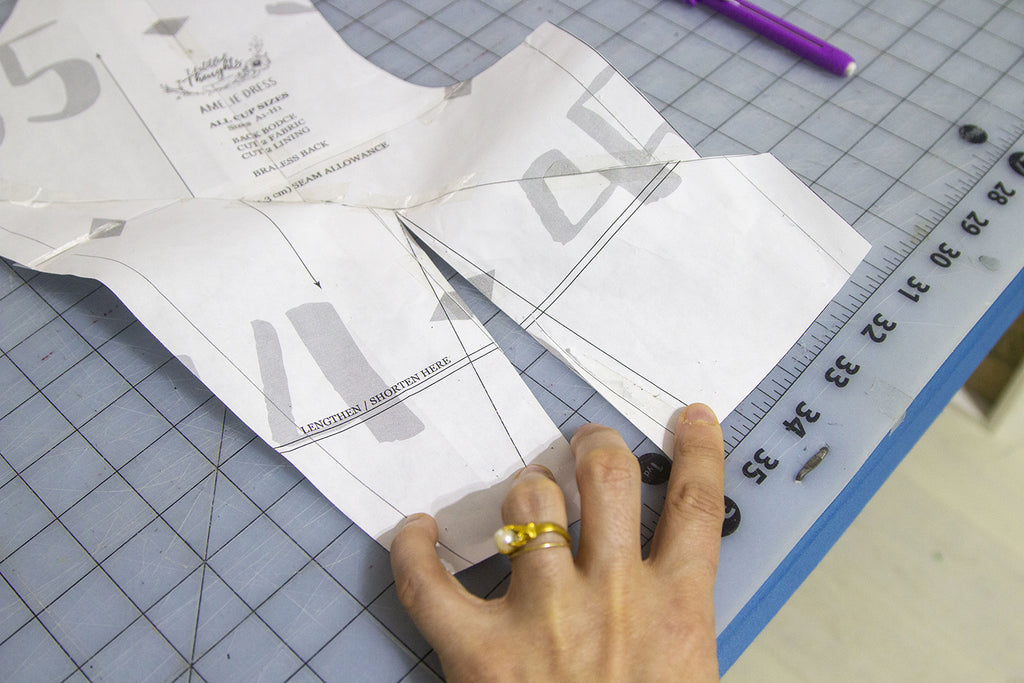
I took the back bodice of my pattern and started to follow the markings I had just transferred.

I began by cutting through one of my new lines to the seam allowance and pivoting the pattern piece shut so that both lines were now touching.

This led me to need to slice through my back dart so that the paper would lay flat, which gave me a slightly smaller dart.


All that was left was to straighten up the various seams that got a little wonky from all of the pattern adjustments.

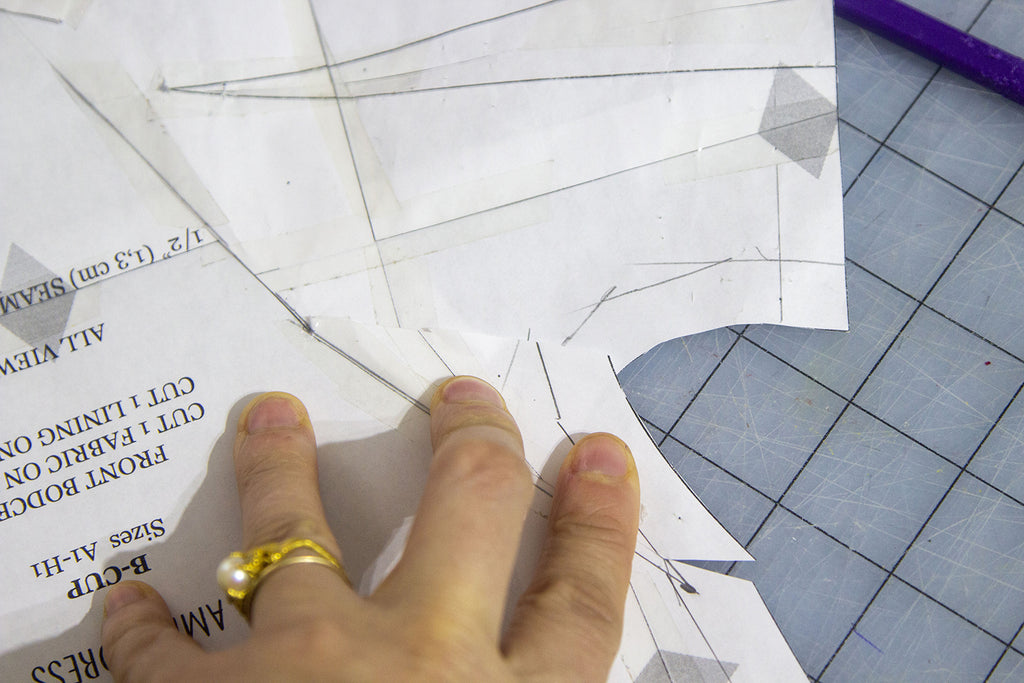
Overall, things were working out pretty well! So I turned my attention to the front bodice piece. This is where things got interesting!

I decided to take the same approach as I had for the back piece and began cutting and overlapping my newly drawn lines as best as I could.

This led to some funky bubbles in the pattern which I proceeded to snip and adjust until the pattern was lied flat.


Aside from the armhole opening, the front bodice still looked more or less the same as it had before my alterations.

To adjust the armhole, I took the original measurement (9" [22,9 cm]) and played around with my flexible ruler until it looked like the original armhole with that same measurement.


I then trued all my seams and made sure that the front and back side seams were the same length.

This is what my newly altered pattern pieces wound up looking like:

Not so bad, right? Even though the pinning and all those lines looked wild, everything came together in the end!
It was then time to cut out Toile #2. I managed to squeeze the new front and back pieces out of the original ones which was awesome!

I am going to pause here for today as I went through a lot with this first toile. Which is typical - the first one's I have found usually have the most amount of alterations. Each subsequent toile seems to get a little easier and brings you closer to your ideal outcome. Which you will find in my next post, Fitting the Amélie: Final Toiles + Pattern!