
I am so so excited to be bringing you the new and improved Chandler Trouser pattern! This is by far my most popular pattern, and I wanted it to be the best it possibly could for everyone sewing these pants up. It's going to be so much fun sewing these together.
For this sewalong, I'll be doing the following:
1) I've gone ahead and released all parts of the sewalongs so that you can dive right in to making your unique garment. I hope that by doing this, every sewist feels confident to tackle this project at their own pace and doesn't get held up by me in anyway! Plus, for those with the pattern already, I wanted to provide immediate access to the sewalongs in case anyone was mid-project when these updates went live.
2) I will be following my updated instruction booklet as closely as I can so that you can flit back and forth between this sewalong and the drawings in the booklet with as much ease as possible! If you are working with the older instruction booklet, many things have remained the same, though there have been a few updates. Feel free to email me if you would like a copy of the new instruction booklet.
3) I will continue developing supplemental material for this pattern to help you fit your garment to your beautifully unique measurements. You can find all of those posts under Fitting the Chandler.
4) This is the second pattern of mine that also includes a video tutorial for one of the views! I am so excited to be able to offer video tutorials as an additional way to help explain some of the tricky parts of my patterns.
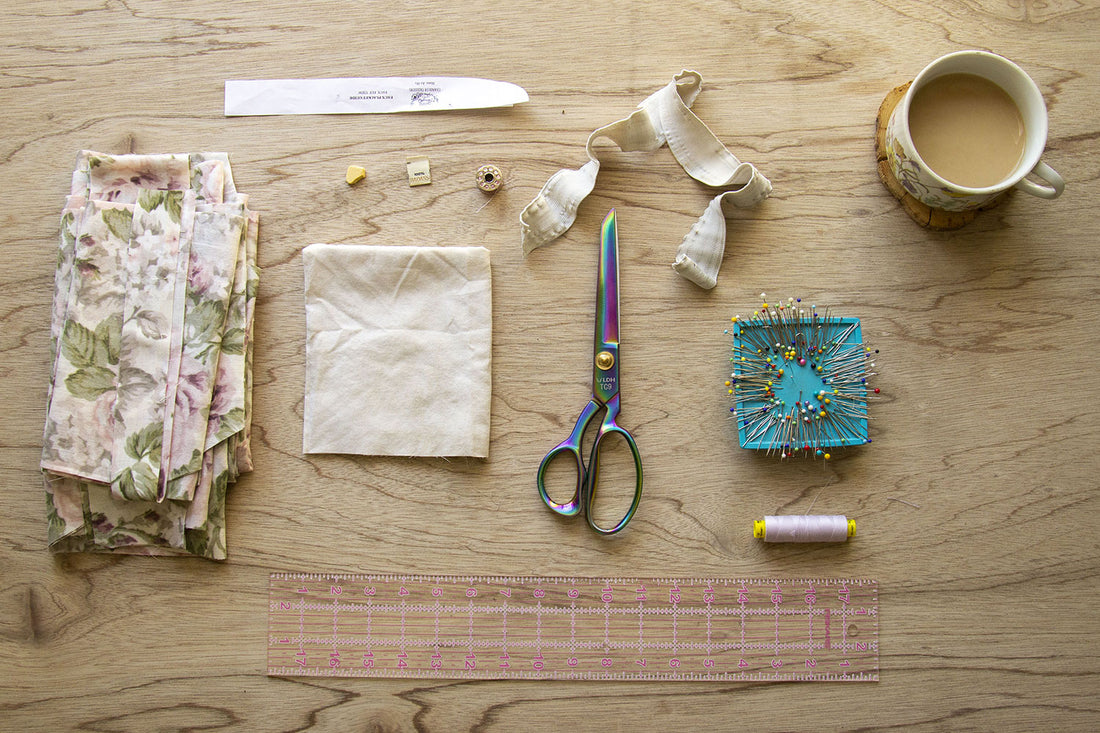
SUPPLIES NEEDED:
Check page 32 of your instruction booklet for a handy Materials Checklist.

For this sample, I am using a mid-weight, thirfted Poly/ Cotton curtain as my main fabric.
Before You Start
There are a few things I'd like to note before we jump in to your project!
1) If you haven't already, I suggest washing your fabric. Nothing is worse than finishing a project and then having it ruined come laundry day. I can't tell you how much I've regretted not taking the time to wash my fabric before sewing it up. So many cute items are now basically child-sized because they have carelessly been tossed into the dryer, and they were never pre-shrunk.
2) While you are waiting for your pretty fabric to wash & dry, I highly highly suggest sewing up a toile. That way, you can be 100% certain that your garment will fit you EXACTLY how you envisioned before you cut out all the pieces in your pretty fabric.
Plus, you can work on some techniques throughout the process that may be tricky and find your favorite way of putting everything together! And since we all are shaped differently, any part of this garment might lay on us imperfectly. Might as well work out those kinks while the fabric is tumbling away in the dryer!
3) The seam allowance for this pattern is 1/2" (1,3 cm) unless otherwise noted.
4) Remember to be easy on yourself, and take lots of breaks! Sewing is supposed to be fun, so if you feel yourself getting frustrated, take a deep breath, tell yourself nice things, and grab a sweet treat! That could mean taking a TV break, walking around outside, grabbing a special cup of coffee, or opting for a quick nap.
Let's Get Started!
Today is going to be a short day, focused entirely on prepping your pattern pieces. I always like to get all the little prep bits out of the way first. That way, when the major sewing begins, I don’t have to stop to change a bunch of settings on my machine — I can just dive right in!
The first thing we need to do is to interface:
- The Front Waistband
- Pocket openings on Front Trouser

A lot of you may not know this, but I stopped using fusible interfacing in 99% of my projects. I am really striving to have fully compostable garments- ones that can be returned to the earth at the end of their life cycle.
In order to achieve this, I have been using sew-interfacing. But I haven't been purchasing it. Instead, I have been using scraps of pre-washed muslin from former projects! I've always hated the idea of leaving these mock-ups to waste away in a drawer or simply be tossed, so I started cutting them up for each project that required interfacing!
If you are interested in using your scrap fabrics for your own sew-in interfacing be sure to check out my DIY Blog Post or Video Tutorial.
Next, stay stitch your pocket openings on both your pocket pieces and your front pant pieces (along the angled edge).


Before I sew my darts, I like to mark out my darts with some tailors chalk or another marking medium safe for fabric. It makes the entire process of sewing a straight line on an angle sooooo much easier than eyeballing it.


Sew your front trouser darts by pinching the right sides of your fabric together, matching up the dart legs and sewing to a tapered point, creating a triangle. Do not backstitch at the end points.


*Note: Some sizes will have a set of two darts that need to be sewn.
Tie off the ends of your threads at the dart point.


Press your darts toward the CF of your trousers. Baste in place.
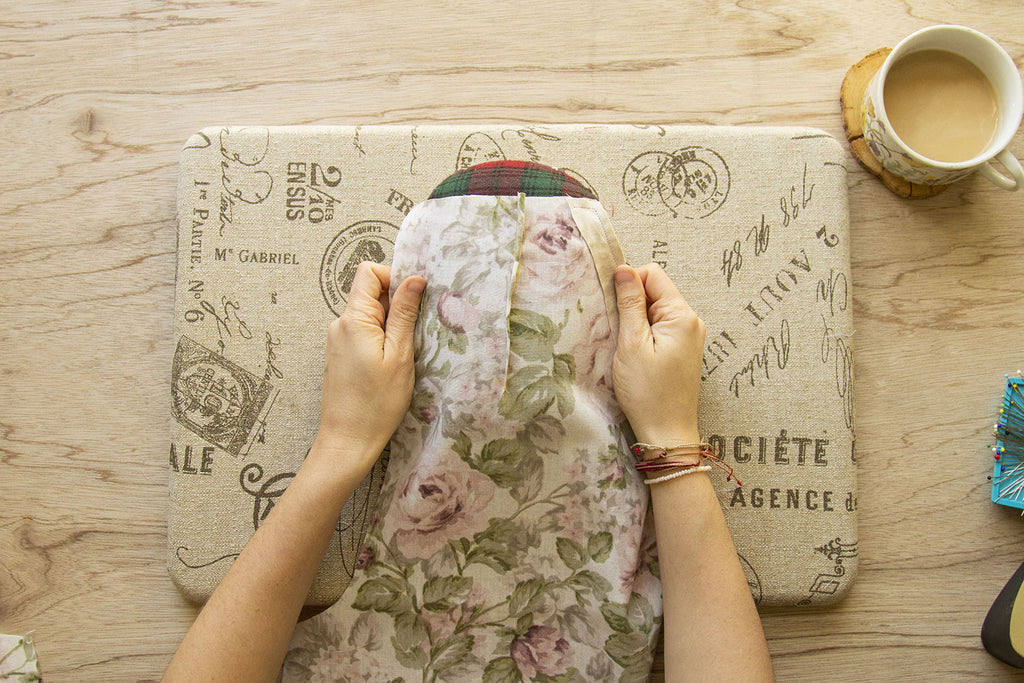


I accidentally pressed my dart towards my side seam and that works, too.
That's it for today! You can pause here if you only had a few moments to spare or feel free to head on to Part 2 - Pocket Assembly if you have a bit more sewing time scheduled!