

Are you all ready to buckle in? I have a feeling this is going to be a lengthy post, filled with loads of images that may or may not be in order. I am starting the writing for this post on September 14th and am sure I will be coming back to add to it here and there over the next few weeks, so my apologies if anything feels disjointed along the way! Grab a cup of something cozy and let's jump right in!
The Inner Corslette
Surprisingly, I was least nervous about actually cutting in to my corslette. At least the structured portion. Perhaps this was because I had ordered more than enough material for the under structure, so I knew if I messed up anywhere, I had plenty to start again.
Sewing the corslette under structure was probably the easiest bit of this entire process. I'm talking about only the pattern pieces, of course. The boning, lining, underwire and outer layers all presented there own challenges, but putting together those initial pieces of coutil were a breeze.
I treated this part like I would any other project. I pinned my pattern pieces directly to the fabric and used my trusty LDH scissors (affiliate link) to cut each piece from the fabric.
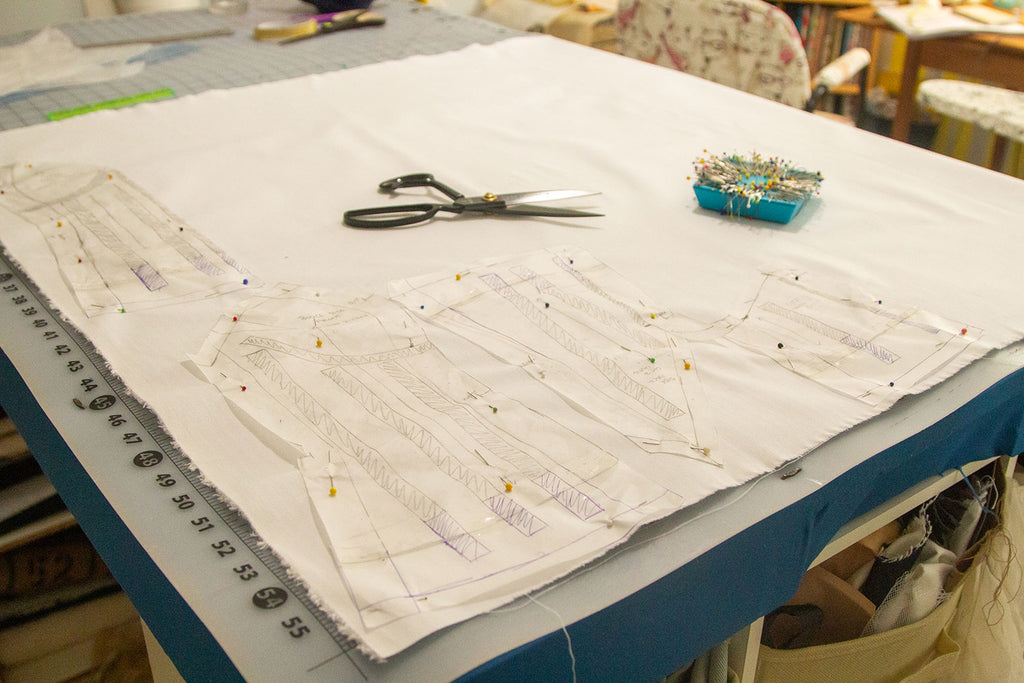


Before removing the pattern pieces from the fabric, I marked where the boning channels and underwire were to be place with an awl. I marked the four corners of the boning channels and all along the underwire channel.


I then removed the pattern pieces and drew in everything I needed with a pencil. Since this is an under layer, I wasn't afraid of the pencil accidentally showing through. Plus, I didn't want to deal with chalk as it sometimes creates a bulky line that is less accurate. I made sure that my boning channels, underwire channels, seam allowances, and darts were all properly marked!

I then went ahead and hand basted each piece in the corslette together. I have to say, I got really good at hand basting as every. single. piece. of my wedding gown has been hand sewn before touching the sewing machine.


I made sure the corslette was going to properly fit my body before taking it to the machine and sewing it together with polyester thread (I don't like using polyester, but it is pretty strong and this corslette needs some hella strong threads to keep it together!).
After clipping my seams and pressing them, I decided I wanted to eliminate as much bulk as possible, so I catch stitched each seam in place. At this point in time, I was also going back and forth on how I was going to finish the inside of my corslette (lining it or keeping it open to show all the work) and I figured this technique would be nice regardless of which direction I chose.

Then came the boning. I have never ever worked with steel boning before, so this was one of those techniques I was quite nervous about trying. I referenced @Kat.makes blog (again!) as well as a few others and eventually found my own preference for creating the boning channels and creating the individual bones.
Boning Channels
Since I was not inserting my boning into the actual seams of my corslette, I needed to make individual boning channels for each piece I would be attaching. To do this, I sewed strips of organza together. I read somewhere that organza is a wonderfully strong material that makes for wonderful channels. It is also lightweight so it won't be as bulky showing through the final bodice. I also had plans to eventually cover these channels individually with bias silk charmeuse (when I wanted the corslette inside to have no lining), and the organza would have acted as the perfect barrier between the spiral steel boning and the lightweight charmeuse.


Spiral Steel Boning

Super early on, I realized that I didn't have enough boning tips for all the boning I planned on inserting into my bodice. I think I was in need of 34 steel tips and all I had was 25. Whoops!
I quickly scrambled to see which boning channels I could eliminate without losing the structure of my garment and I managed to cut down my need from 34 to 26.
Prior to this experience, I had never worked with spiral steel boning before. I had read about its merits and how much better it was for corsetry than plastic boning, but I had never had a project that required its use prior to this one. I think the most difficult part for me was in the actual cutting of the spiral steel. My wire cutters are not that strong, so it took quite a bit of effort to cut through even just one thin piece.
Regardless, for each piece I needed, I took the following steps:
I started by roughly measuring the length I needed for each channel. I got better at estimating the correct length with each one I cut (the first few were a bit too long).

I then bent the steel in a way that allowed me access with my wire cutters to get to one spiral at a time. I had to cut through two different spirals in order to separate the piece I wanted from the longer piece. I have read that you only need to cut a center ring, but I had trouble figuring out what that spot was, so I just went with what worked for me.


Then came putting the tips onto the ends of the boning. This protects not only the fabric but you, the dress wearer, from having the steel tear through and poke you in the ribs. I took Kat's advice and used two pairs of needle nose pliers to get each of these tips situated. It definitely made the process go along much smoother than if I had only used one!


It was suggested in many places that I should seal the tips in some way to prevent them from moving/ falling off/ etc. Kat used nail polish to seal hers but I am impatient and wouldn't be able to wait for my pieces to dry so I searched the internet for an alternative. I can't remember which blog (I am so sorry!), but a blogger out there mentioned using electrical tape to seal the ends of her boning tips and I thought that was brilliant! Especially since I had plenty of electrical/ plumbers tape from past projects that wasn't being used for anything else.


So, for each boning tip, I wrapped it up a few times with the tape I had on hand. It worked brilliantly!
Finally, I inserted each piece into its respective channel and then sewed the edge up to seal it inside.


I repeated these steps until all of the boning was in place!
The Outer Corslette + Lining
The outer corslette luckily did not require as much structure a the inner corslette, but that doesn't mean it wasn't a LOT of work. But before I started on my outer corslette layers (there were 3 in total!), I thought it might be best to practice my skills with the lining. That way, if I messed anything up, at least it was tucked away on the inside of the dress where no one (but me!) would ever see.
And mess up I did...
For some reason, past Brittani thought it was a good idea to stop the pattern pieces for my lining + outer layers at the waistline. My thinking was that I would eventually need the skirt to attach to bodice at some point and the best place for this would be the waistline.


However, I forgot to take into account a) the lining needed to cover the entire inner structure otherwise it might irritate my skin and b) the outside of the inner corslette needed to be fully covered as well otherwise the boning and seamlines would show through the bias cut skirt. Ugh!
Thankfully, I realized this error at the lining and quickly adapted. I used a catch stitch to tack the lower edge of my lining in to place for the time being (I will circle back to finishing the bottom edge off at a later date) then made a note to adjust my pattern pieces for the outer layers.
I didn't feel like completely redrawing all of my pattern pieces for the outer layers since there were so many pieces to draw (11 pattern pieces in total that I used!). Instead, I did a makeshift sort of thing with the inner corslette pattern pieces to get the length correct.
On to the cutting process! As I mentioned before, I had three outer layers for the outer corslette. I wanted to be as efficient as possible, so instead of cutting each layer out individually and then lining them up to baste them all together into one piece, I laid out each of my fabrics with their grain lines matching.

I then pinned all three of the pattern pieces -- one without seam allowance, one with seam allowance, and the makeshift inner corslette piece -- through the fabrics.

Then, one by one, I traced the outline of each individual pattern piece very carefully using two different colored frixion pens. One color marked the cutting line and the second color marked the stitching line.

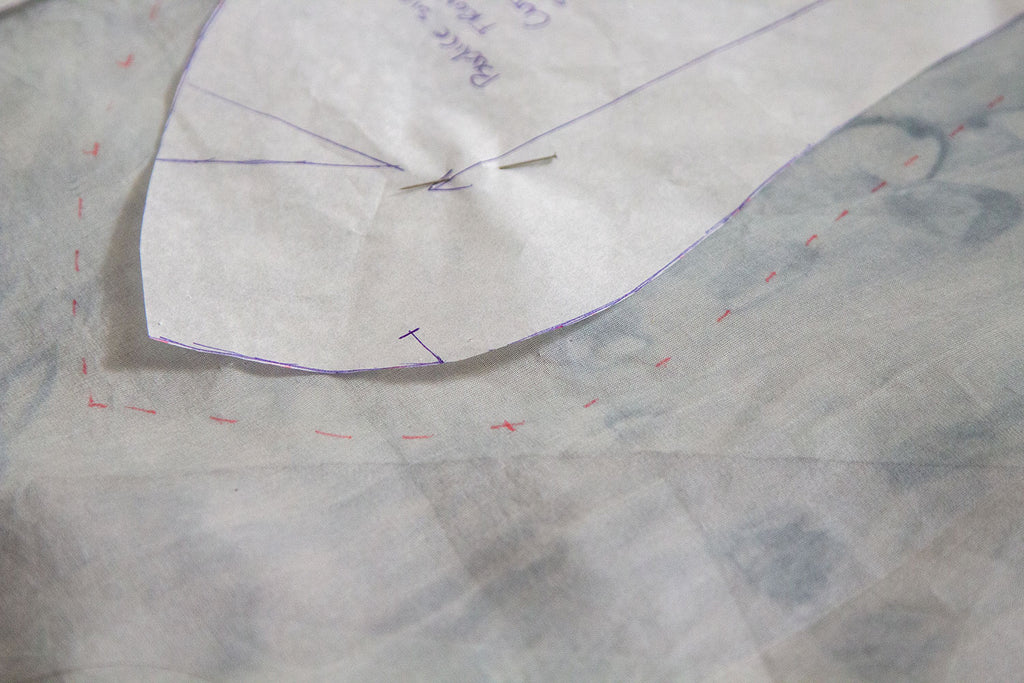


Before cutting out my pattern pieces, I made sure to baste all three layers of my fabric together about 1/8" (3 mm) away from the seam allowance line. This effectively made my three fabrics turn into one singular fabric that I then basted to my other pattern pieces before sewing them together on my machine.


But why three layers?
For the upper two layers, I was basically following the same formula as I did with my skirts (see below). I wanted to make sure that the bodice looked the same as the skirt did with the same layers it had to create a cohesive looking dress. However, the third layer was purely for creating a smooth silhouette.
See, in my research stage, I came across a blog post somewhere that mentioned using silk organza fabric to help reduce the sight of the inner structure of the corslette. I suppose this works much the same way using organza for the boning channels works because it is strong enough to withstand the strain of the inner structure, but it also is smooth enough to glide over and diminish the sight of bulky seams in a way that lighter silks can't do. That's my logic, anyways! If anyone actually knows the real answer to this, I am so curious to learn!
Finally, with the outer corslette all sewn up and pressed and clipped and ready to go, I attached the right side of the top edge to the lining bit of the bodice. I then did a lot of clipping and grading and understitching before the bodice -- and all 5 of it's layers!-- was completed. Yay!

Whew! About halfway through writing this blog post, I realized that it was getting SO LONG! Plus, I noticed I had accidentally combined two separate blog posts into one. Oops!
I hope you don't mind, but I have divided this post into two parts. I figured that way, I could go into more detail about sewing the skirt and lace and such without having one post that is basically a short novel! I will see you next time for Part 7 - The Real Deal (2/2) soon!