
I think the most common alteration performed on the Mathilde Wrap dress during testing was definitely shortening the bodice. All of my patterns are drafted for someone who is 5'8" (173 cm) tall with a slightly longer torso. So it comes as no surprise that shortening the bodice was the most common alteration!
Generally, shortening a bodice is a pretty simple task. However, because of the French Darts, it can seem a bit... strange. The steps are still the same, but the overall look of the finished pattern piece can feel very odd even when it's perfectly perfect!
Let's dive in, shall we?
Before we get started on altering the pattern, I am jumping in to this tutorial under the assumption that you already know how much you are looking to shorten (or lengthen) your bodice pieces. If you are unsure of how to find this measurement, I’ve got an entire blog post for you! Hop on over to Common Pattern Adjustments: Torso Length, and then meet me back here once you have your measurements in hand!
The first step in this process is to trace out both your front and back bodice pattern pieces. I never make alterations to my original pattern pieces. Why? Because if I make a mistake, or I go up/down a size in the future, I want to make sure that I have those original pattern pieces intact to work from without having to print off a brand new pattern.

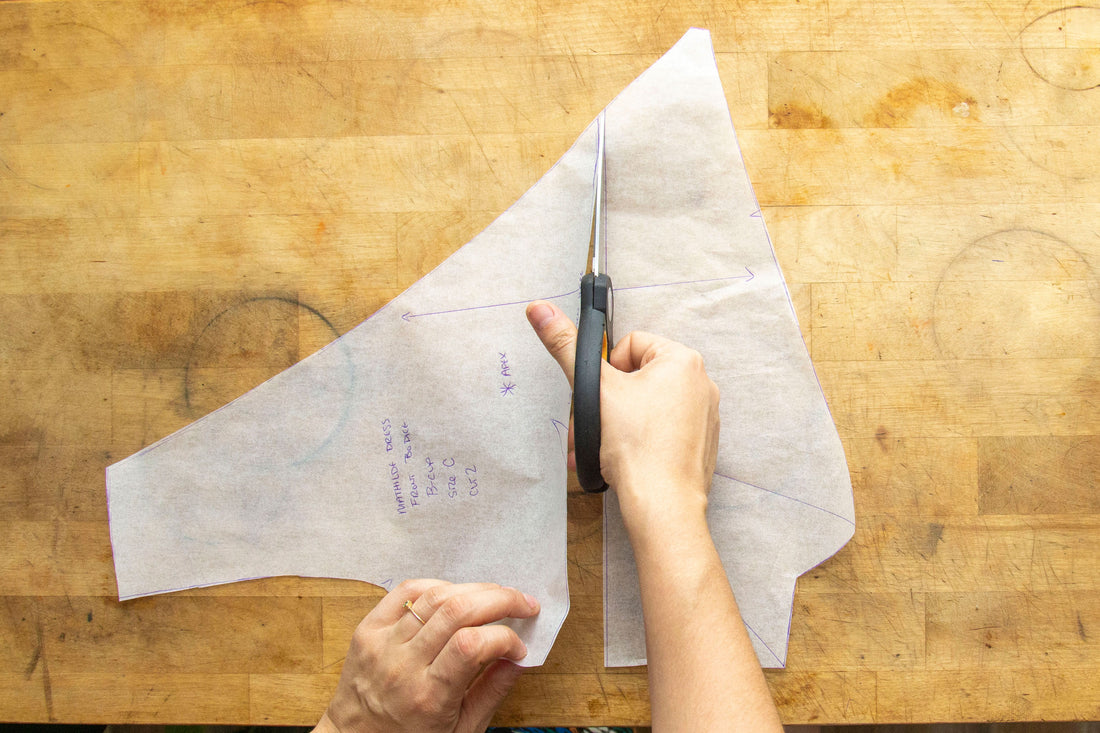
Once your pieces have been traced off, you’ll want to start this process by cutting along the lengthen/ shorten lines. I believe the “rule” is that if you are lengthening, you cut along the top line, and if you are shortening, you cut along the bottom line. Honestly, I am not sure of where I heard this “rule” or if it’s even true, so generally, I just cut right in between the two lines. So far, nothing crazy has ever happened to me from doing that!


Take your pattern pieces and overlap them the total amount you are going to be shortening your bodice length. For this example, I am shortening the bodice length by 1” (2.5 cm). You’ll want to make sure that your grainline remains intact, which may cause other portions of your pattern to look funny. Don’t worry- we will fix those parts one-by-one in just a second!


Once you have your overlap in place, tape your pattern pieces together so that they don’t shift around on you.
It’s now time to redraw those dart legs. This part is super simple as you are just connecting the original dart legs to the end of the dart point, thus creating a new dart.

The tricky part of this actually comes from whether:
- Your dart is still pointing towards your apex (not the pattern apex, but your unique apex point), and
- If your dart is too wide for its respective length.
To see if the apex is is the correct spot, you can tape up your new dart and do a mock “tissue fit” where you place your pattern piece over your body to see where the apex is hitting relative to your body OR you can sew up a toile (muslin) using your finalized pattern pieces before making further alterations.
If you do find that the apex is no longer in the correct place and you hope to shift it, I’ve got another handy blog post waiting for you!
The other issue you might find is that your dart width is too wide compared to its length. When a dart is too wide for its respective length, this drastic change can cause the bust points to be rather… pointy. For some, this is a non-issue, but for many, avoiding a point at the end of our darts is paramount.
But what is the right width to length ratio for your dart?
Honestly, the answer to this question depends. It depends on your cup size, the location of the dart, the fabric you are using, and your own personal preferences. I wish that I had a sure fire answer that would work 100% for everyone, but I don’t. (If you know of a general guideline, feel free to share! A quick internet search yields next to nothing regarding the proper ratio to maintain.)
For myself, I go based on gut instinct for the most part. I’ve made a fair share of garments with darts that were too wide (including my own Amelie Dress while in testing!) and wound up with a dart point that was quite pointy. As my own personal rule, I try to keep all my bust darts less than 4” (10 cm) by 6” (15 cm) long, and that is pushing it for me.

 This bust dart was just barely under those measurements.

 This bust dart was just
 When in doubt about your bust width to length ratio, the easiest solution is to simply transfer the excess width of your dart into a second dart. This is why it is common to have more than one dart on patterns with larger bust sizes. There is a more abrupt change in fullness from the full bust relative to the rest of the figure that requires multiple darts to achieve a proper fit.
If you believe that you need to add another dart to your bodice, I have gone over similar steps in how to achieve this in Performing an FBA/ SBA on French Darts!
Once you have your bust dart ratio sorted (and potentially a secondary dart placed on your pattern) it is now time to finish up your pattern alteration! If you made it this far, I know it has been a bit of a long journey. Feel free to pause, grab a cookie or coffee, or stretch a little. Especially if you went down the rabbit hole of all the other blog posts- you deserve a quick recharge!
The last steps are to true up your side seam, CF neckline, and alter your back pattern piece to match the changes you made to the front.
For your side seam, line your ruler up from the underarm point to your waist point and draw a new line. Then cut off any excess pattern paper.


For your neckline, pick a point above where you have shortened your bodice and then grade into the original cut line. You can either do this with a ruler, French Curve, or eyeball it!

Trim off your excess paper and VOILA! You now have a completed front bodice piece that has been properly shortened to your specifications - YAY!

But before you rush off to cut your fabric, you need to adjust your back pattern piece by the same amount, otherwise your side seams will wind up looking a bit like a step ladder!
Luckily, without a dart, adjusting the back piece is super straightforward. You’ll follow the same initial steps you did when working on your front pattern piece.
First, cut along the lengthen shorten line.
Then, overlap your pattern pieces by the same amount you overlapped your front pattern pieces. Make sure that your grainline (or in this case, cut-on-the-fold-line) is overlapping properly.

Draw a new line connecting your underarm seam to your waist seam and cut off that excess paper.


NOW you can celebrate!! Both your pattern pieces have been adjusted and are ready to be made into your very own Mathilde garment!
