
There are so many options to sewing together knits, it can feel quite daunting to dive in and even begin. Do I serge or use my sewing machine, or what about that machine called a cover-stitch? And what stitch should I even use if all I have is a regular sewing machine? Do I use a zig-zag or can I get away with a straight stitch? What about that little lightning bolt looking thing? And isn't there a triple zig-zag stitch, too? What the heck is that even used for...?
The questions can rattle around in your head until you simply walk away from your project, overwhelmed and defeated. But I am here to help! I am here to answer all of those questions (and then some) in an effort to make sewing your knits and choosing a proper stitch a bit less overwhelming.
Do I serge or use my sewing machine, or what about that machine called a cover-stitch?
This question's answer is entirely up to you, your comfort level, and the machines you have access to. I have used each of these machines and they all have advantages, but I personally don't believe any is better/ worse for sewing up knits that the other. It's all a matter of preference and, again, what you have access to in your sewing practice.
Sergers are wonderful for putting together your knit garments at lightning speed, all while cleaning up the inside edges of your garment.

However, many patterns have a seam allowance greater than the standard size of a serged stitch (1/4" or 0.6 cm) which means you have two options:
- Utilize your serger knife to cut off the excess seam allowance
- Cut off your excess seam allowance prior to serging
I generally opt for option 2 only because my serger tends to get tuckered out after a while of cutting off the seam allowance of my garments. When that happens, not only is my knife blade getting dull (suuuuper quickly I might add), it also starts sucking up more of my fabric and jamming up. Never a fun thing to contend with.
However, when I take the time to pre-cut my seam allowances down to 1/4" (0.6 cm)-- whether on my actual pattern or on my fabric pieces-- and cut off the bare minimum, the sewing process is much smoother.


When using a serger to sew together your fabric, or even tidy up your hem, you must also contend with A LOT of options as to getting your stitch exactly right for your particular fabric. For me, I find it best to keep my scrap fabric (left over from cutting out the pattern) near my serger and I test, test, test.
When serging (and sewing for that matter) knits together, you want to find that perfect balance where your fabric isn't being pulled through your machine too quickly-- which can cause a wave in your fabric or stretch it out-- or too slowly -- which can cause your machine to jam up and "eat" your material.
With a sewing machine, you only have a few functions to contend with altering:
- Your stitch length/ width
- Your actual stitch choice
- Your sewing foot
- Your thread choice
With a serger, it can be even more complex to get that balance just right as you might find you need to play with:
- Your stitch length
- Your differential feed (which controls the two sets of feed dogs sergers have, causing one to move faster/ slower than the other)
- Your thread choice
- How much seam allowance you are cutting off
Both have the same number of issues to address, but a serger is a more complex machine with more complex solutions to delve in to. It can be done, but like I said earlier, you will want to have some fabric handy and get ready to test, test, test...
Now, to answer that last part of the question regarding a cover stitch/ cover stitch machine...

A cover stitch machine is a specialty machine that focuses on a limited number of abilities with its primary function focused around hemming knit fabrics with that iconic double topstitch + serged stitch all in one go.

It can also be use to create specialty stitches like those found in sports wear with the serged looking stitch found on both the top & bottom of a seam (also known as a flatlock stitch).


To me, a cover stitch machine is a bonus if you have it, but it's definitely not a necessity. Many of it's stitches can be mimicked with a serger or a serger + sewing machine combo. And many stitches that a sewing machine does may not look as "professional" as a serger or cover stitch, but the functionality is on par with either.
In the end, which machine you work with is entirely up to you and your personal preferences regarding the finishing details. Just know that I once owned all three, but I sold my cover stitch to a friend years ago and I don't miss it. I also have found myself using my serger less and less, opting instead to work primarily on my sewing machine. I don't mind the zig-zag stitches or the "less than professional" finishing as many people I find don't look at my garments that closely, and the functionality of my clothing is the same, plus if anything, it's easier to repair as my clothing wears down!

And what stitch should I even use if all I have is a regular sewing machine? Do I use a zig-zag or can I get away with a straight stitch? What about that little lightning bolt looking thing? And isn't there a triple zig-zag stitch, too? What the heck is that even used for...?
Whew, this is a big one to dive in to! Whereas with a serger or coverstitch, you have limited options in your stitch choice and instead need to focus on other more technical things for maintaining the perfect stitch for your fabric, a sewing machine has so. many. stitch. options! It's definitely an overwhelming thing to think about.
So let's dive in one-by-one, shall we?
Do I use a zig-zag or can I get away with a straight stitch?
The answer is: it depends. The reason we primarily use zig-zag stitches for our knit garments (and why sergers & cover stitchers are so great for knits) all comes down to the stitch's ability to move and stretch with the fabric.
If you take any piece of knit fabric and sew it with a zig-zag stitch vs a straight stitch, almost 100% of the time, the zig-zag stitch is going to have a better chance at stretching with the fabric without the stitches popping.


The only time this doesn't hold true is when you are pulling your fabric while sewing a straight stitch. This isn't something you would do with knit garments as that distorts the knit itself (and causes your stitches to be very loose), but it's quite common to see when adding elastic channeling to pants.
There are very few instances when you will use a straight stitch on knit garments and they are almost always either:
- At a point where little stretch is needed in your garment
- Used on a structured knit, such as a ponte, that stretches very little to begin with
- As a reinforcement over a stretch stitch, such as along a neckline
Generally your pattern will inform you of when a straight stitch is necessary and how long to make that stitch so that it stands the wear of your garment over time.
What about that little lightning bolt looking thing?

I am going to be 100% real with you all- I didn't know what that lighting bolt stitch was until like a year or so ago, and when I used it, I hated it.
The lightning bolt is definitely not in my current repertoire of stitches as it is just a real pain in the butt to try and seam rip if you make a mistake. In fact, I found it easier to start a garment over again than attempt to get that stitch undone. But I can see the appeal it has for many sewists.
The lighting bolt stitch is a super strong stitch that not only stretches really easily with your fabric, it also looks more like a straight stitch, therefore, it's a more "professional" option for finishing your knit garments, especially around things such as the hems.

My personal advice on this stitch: only use it if you are 100% confident you will not need to rip it out at any point. I'd say maybe only using it on your T&T (Tried & True) patterns. You know, the ones that you could probably sew together in your sleep. Those are good contenders for that particular stitch.
And isn't there a triple zig-zag stitch, too? What the heck is that even used for...?
You are absolutely correct, there is a triple zig-zag/ multi stitch zig-zag stitch. This stitch is really awesome for reinforcing or sewing up points in your garment that you know will experience loads of strain when being worn.

A few great places to use this stitch include:
- The final stitch to secure elastic to any opening (leg, waist, etc)
- When sewing up a bra
- Under armholes attached to sleeves, especially if they are tight
- Along the seams of tight fitting garments
I don't use this stitch often, but when I do, I definitely notice a difference in the longevity of my garment.

What to Look for in your Stitches
Now that we have gone through ALL the options and machines you could possibly use, let's chat a bit about what you are actually looking for in a stitch.
First off, you are looking for minimal to zero skipped stitches. That is definitely important, especially on things that you will see from the front of your garment (hems) as well as those strained points that require your stitches to stand the test of time.
If you are having issues with your stitches skipping, you may need to do one of a few things:
- Make sure you have the appropriate needle in your machine (sewing, serger, or cover stitch). I have a post all about choosing the right needle HERE.
- Adjust your stitch length / width. Sometimes, certain fabrics require more time between the needle coming up from the fabric and going back down into the fabric to make a stitch. It's super odd, but if you are having an issue with skipped stitches and your needle is right, try lengthening your stitch a bit to see if that changes things.
- Potentially changing out your foot/ amending your foot. I have heard nothing but magical stories about utilizing a walking foot when it comes to sewing knits. I have yet to use one myself because I don't believe I own one, but everyone seems to sing its praises.
If you don't have a walking foot, no worries! You can do what I do - sew with tissue paper and quite possibly tape. It sounds odd, but it works on almost every challenging fabric I have ever encountered.
First, you can test just the tissue paper aspect. I keep a drawer of it stashed away in my studio for moments such as these.
Place your tissue paper under your foot so that it touches the feed dogs (I used blue so that it would show up in pics- this isn't what I'd normally go for, haha).

Then place your project between the tissue paper and your machine's foot.

Sew your project as you normally would, making sure that there is tissue paper under your fabric seam at all times.
Once you are done with your seam, simply rip away the tissue paper. Don't worry too much about any little bits that get caught in the seams- those generally come out in the first wash.


If that doesn't work, you can do the same thing with the tissue paper, but this time, put a bit of tape along the bottom of your machine's foot.

This helps to glide your fabric through your machine a bit easier and for some reason helps reduce the number of skipped stitches as well!
If all of these tips and tricks fail, it might just be that you have the most difficult knit fabric in the world. I have had those fabrics and they always lead to tears, Generally they were synthetic fabrics with high amounts of polyester or nylon or something slick and stretchy that caused my stitches to never catch properly. For those fabrics and projects, I resigned them to the scrap pile or simply lived with the skipped stitches.
Whew, that was a long, but necessary segue. Now onto what you are actually looking for in a stitch.
Basically, you want your fabric to remain flat, have little to no waviness, and there to be zero-distortion/ stretching as you feed it through the machine.

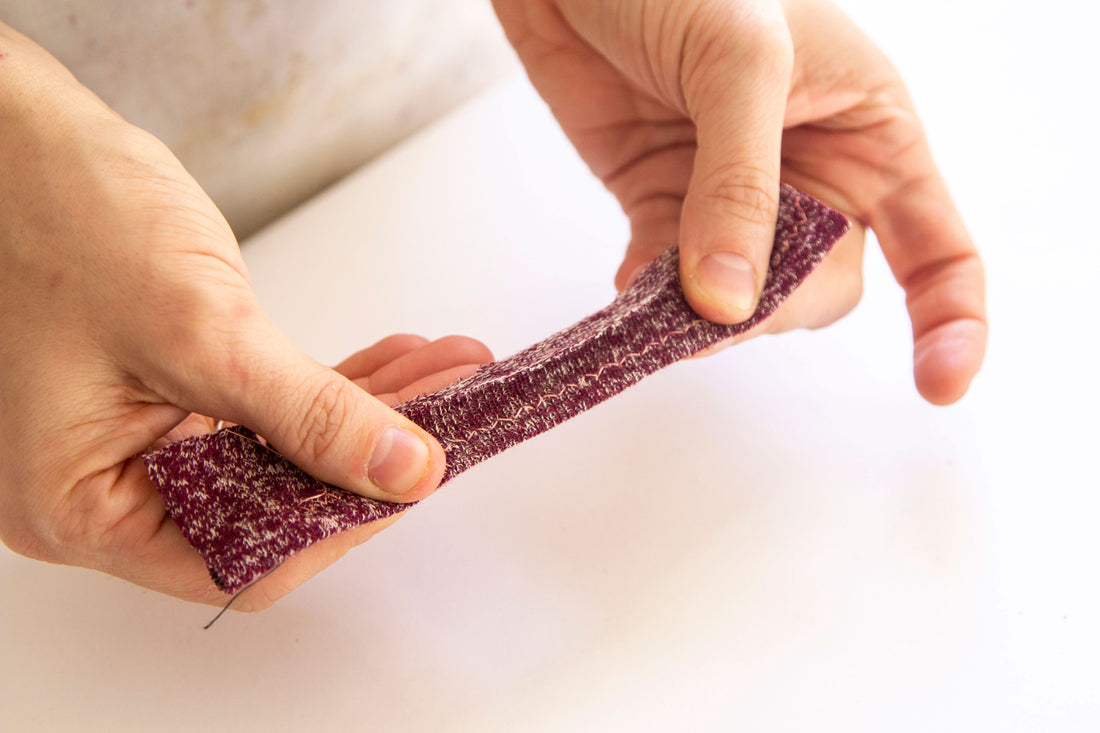
 This stitch is too narrow and short in length, which is causing it to get stretched as it feeds through the machine, resulting in bumps that no amount of ironing will resolve.

 This stitch is too narrow and short in length, which is causing it to get stretched as it feeds through the machine, resulting in bumps that no amount of ironing will resolve.

 This is a much better stitch as the fabric lies flat and smooth and hasn't been stretched out of shape through the machine.

 This is a much better stitch as the fabric lies flat and smooth and hasn't been stretched out of shape through the machine.
You also want to be able to pull your fabric pretty generously without seeing big holes through the seams and without the stitches popping.


When you wear your garment, you want the seams to lie flat against your body and not create non-existent bumps and ridges along your fabric which can feel quite uncomfortable against the skin.
All of these issues can be worked on when sewing your knits using the tips I have mentioned above. Sewing up your scrap pieces until it looks satisfactory to you is so so important. And once you have those settings down, take a picture & jot down some notes so that the next time you work with a similar fabric, you have a good foundation to start at. It's how I've come up with my very own "rules" when starting a knit garment that I use time & again and then tweak as the project calls for it.
There you have it! This was all that I could think of from my years of struggling with knits. I hope that this post was informative & helpful and that you feel better about sewing with knits, regardless of your machine!
If there is anything I failed to cover, or any tips you use that you find beneficial, feel free to share them in the comments below! Let's help each other to conquer our fears of sewing knits, cause they can be oh-so-rewarding!
2 comments
Hi Asmita!
Oh that is wonderful to hear! You definitely don’t need a serger to sew knit fabrics! I rarely use my serger when sewing knits, unless it is a particularly challenging material. I hope that you have had the most fun sewing up your kids’ t-shirts using all these tips and tricks :) !
Thank you for this fantastic post. I have a regular machine and have contemplated getting a serger but right now I can’t afford it. This is so useful—especially all the words on the “zigzag” stitch" as I go on to sew my kids’ t-shirts. Thank you!
@elephantinthestudy