
This is going to be a super simple blog post, mainly because I didn't think to begin documenting my progress until after this DIY was nearly completed. I still thought it might be fun to share the bits that I did manage to photograph, though! I apologize in advance for the lack of imagery.
For the longest time, we have needed a place to store our gardening tools. Just one dedicated area where we could go and easily find everything we might need for an outdoor project. Up until I built this mini-shed, our tools could be found any and everywhere! Sometimes they would be left out in the open, exposed to all sorts of weather conditions. Other-times we didn't know if a certain tool might be located in the garage or under the pergola or buried somewhere in the garden (I can't tell you how many shears we have unearthed after misplacing them while pruning).
So I set out to create a housing solution utilizing leftover doors.
You read that correctly: doors. We had a growing number of doors lining our garage wall. All of them had come from our house. Two were closet doors (one which was now a cat litter room and the other being the master closet where we felt a door was unnecessary) while the third was our original front door, which we had failed to paint and wound up replacing out of frustration. Note to future self- painting yellow over teal is difficult when your door is metal.

I figured that these doors would make a wonderful mini-shed with minimal work. I mean, they were practically their own walls already! And I already had all of the materials I could possibly need, with the exception of some corner braces that I wound up purchasing. In the end, the total cost of this entire project was around $4 USD !
Supplies
Below are a list of materials I wound up using to complete this project:
- Three doors, 2 of roughly equal size + 1 larger one
- Outdoor screws ranging in size from 2"- 3" (5 - 7,6 cm)
- One Large Pallet
- Scrap wood 2" (5 cm) thick
- Scrap wood 1/2" (1,3 cm) thick
- Scrap quarter round
- Two 2" x 2" x 8' (5 cm x 5 cm x 2,4 m) furring strips
- Large piece of rigid plastic from an old picture frame
- Small Nails/ staples
- Leftover paint from our pantry remodel
- Wood Glue
I truly wanted to utilize as many scraps as I could! Not only would this save $$, but it also would help to clear out our garage from the growing piles of scrap wood I have trouble letting go of. Plus it's more sustainable to use what you already have!
The Process
To put together the doors, I first had to take some pieces apart. This included all of the hinges, door handles, and the little part that springs in on the side of the door when it closes. Removing them was a piece of cake, but then I was left with massive holes where the door handle mechanism originally resided.
To patch these holes, I used a combination of drywall mesh patches and a whole lot of wood patching compound, both of which we had leftover from other projects. I don't know if this was the right way to go about doing things, but it certainly seems to have worked!
Once the patching was dry, I sanded all of the doors and got to work putting them together. I started by attaching one furring strip to the long edge of one of the closet doors. I repeated the same thing with the second closet door. The furring strips wound up being much longer that the actual doors themselves, so I took a jigsaw and cut the excess amount off.
I then lined up the furring strip edge of the door to the larger front door along one of it's long edges and attached the furring strip to the front door. I repeated the same process with the second closet door on the opposite side of the front door. I was already nearly finished with my mini shed! It could even stand up on its own!
My husband then helped me to attach a bit of scrap wood along the bottom edges of the closet doors. These strips of wood would eventually be what held the shed to the pallet that would act as the floor of this project.
I then moved on to combining scrap 1/2" (5 cm) wide pieces of wood to the top of my shed, like a makeshift roof. I simply added as many pieces of scrap wood as I needed for the entire top portion of the shed to be covered and then screwed all of the pieces in to the top edges of the doors. The shed was getting sturdier and sturdier every moment!
Finally, I cut some of my larger 2" (5 cm) wide boards into slating triangular shapes. I won't lie- my triangular shapes are really wonky as I used a jigsaw to cut them out (the circular saw we have is a bit scary and too heavy for me to use for long periods of time, so I often opt for using the jigsaw), but that didn't really matter and they would still hold the plastic roof in place when I needed it.
I attached the triangular wood to the top of the roof structure using some wood glue and long screws. My shed was finally ready for some paint!

Once the shed had been painted and the paint had dried (it took a total of two coats to fully cover everything), it was time to move it into place.

My husband and I picked it up and walked it to our backyard where I had already laid out a used pallet and leveled it on the ground. We set the shed in the center of the pallet and then I anchored the shed in place by driving screws through those bottom pieces of wood into each pallet board it crossed.
The final thing needed to complete this shed was attaching the roof! I took the scrap piece of frame plastic and placed it on the sloping, wonky triangular wood. Then, with a stapler, I stapled in a combo of heavy duty staples + nails through the plastic into the wooden triangles. The plastic did wind up cracking a bit at the points of entry from the staples/ nails, so next time I try this I might opt to attach the roof with screws instead.
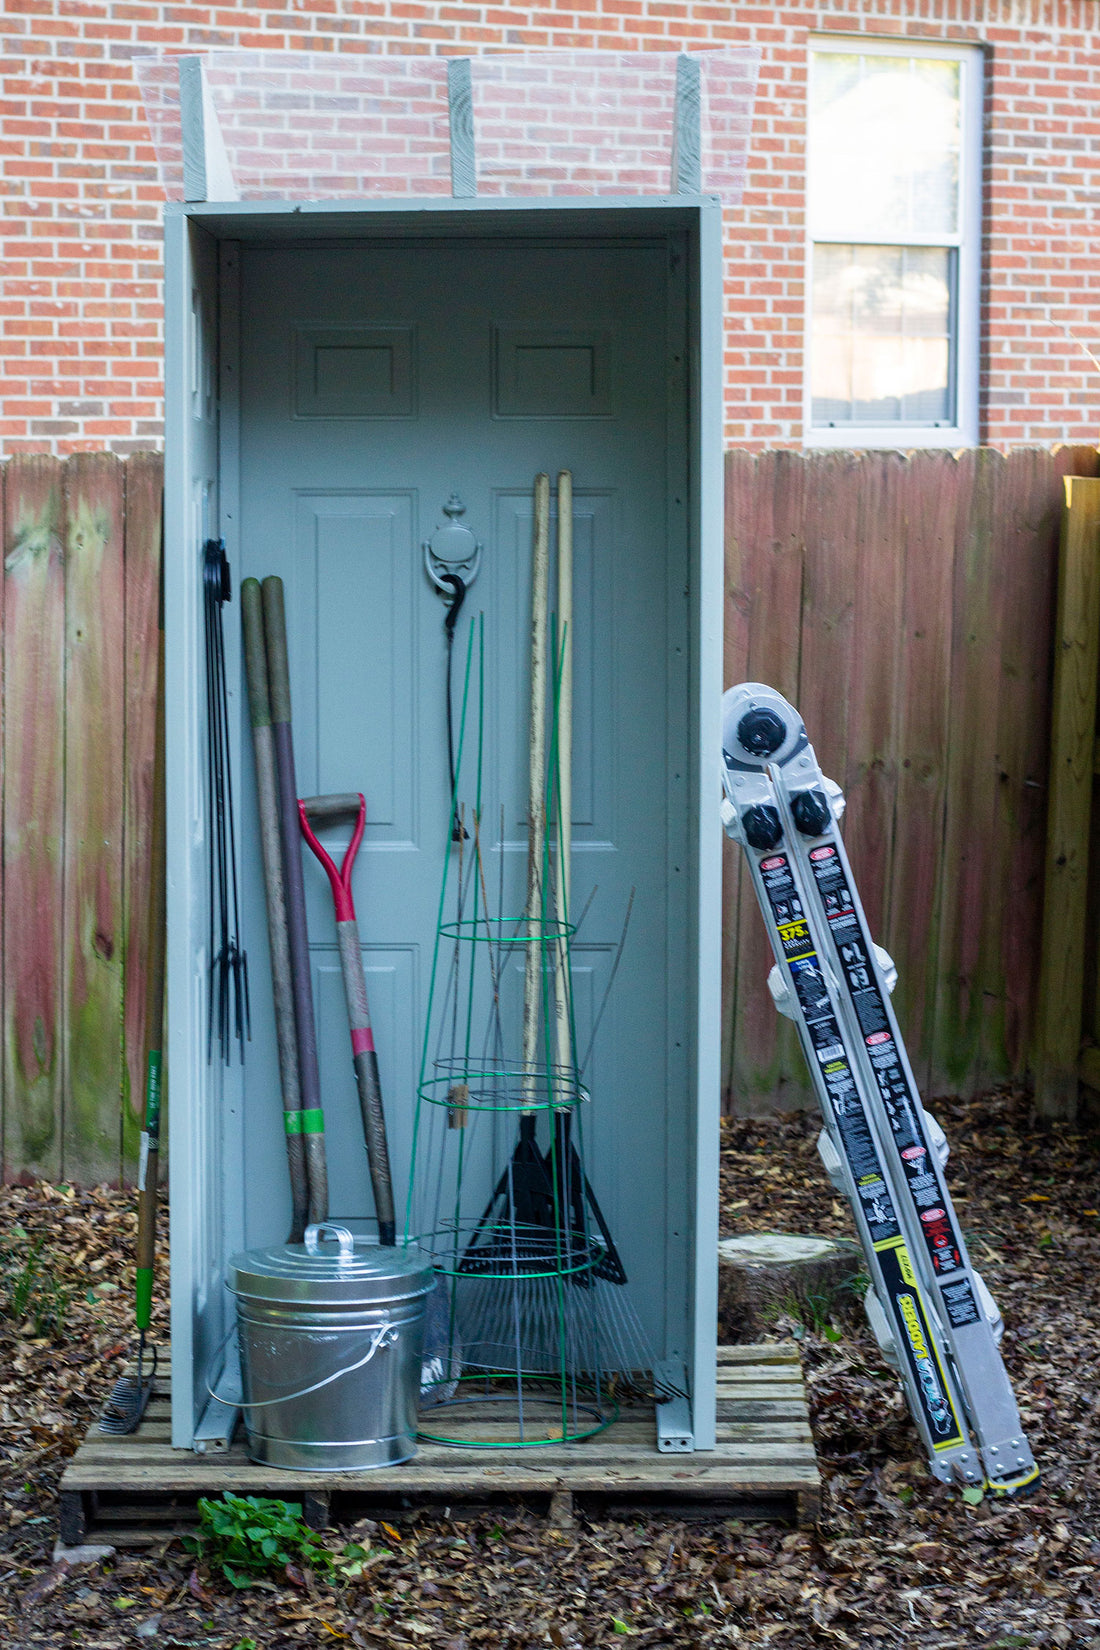
Et voila! My mini-shed was complete and perfectly fit the tools that needed a bit of shelter + a permanent home when not in use! I was even able to utilize the front door knocker and a hook already on one of the closet doors to hang things.


Maybe in the future I will add more hooks around the outside, or even a few small shelves to the inside to hold smaller items not easily contained by leaning against the shed, but for now, this works well for us! Plus the upper shelf under the plastic roof works well to hold some of our bamboo trellising poles.


I just love how the tiniest sliver of the shed peeks over our fence into the side garden. Perhaps I will paint something fun or whimsical on the slanted edge in the future? Maybe the name of this mini-permaculture farm I seem to be building.
