
Before I jump into this post, I just want to note that I am not an expert on measuring the human form. I'm not really sure if there is an expert in that particular arena. I can say, though, that I have been measuring myself ever since I started sewing and my makes have all fit me pretty accurately. I also used to work in alterations and have done a lot of custom work in the past which both require extensive measuring, so I'd like to think that I know a little about measuring!
There are some common mistakes when it comes to measuring that I see lots of new sewists make time and again, and they are mistakes I made when I first started sewing as well! I also go over a few tips and tricks to help make measuring yourself a bit easier that also take into account your daily movement -- we all know how awful it is to be wearing a super cute outfit only to realize we can't sit or eat in it!
PS- There is a really amazing video by @leila_sews on IG specifically for measuring plus size bodies. She goes through taking specific things into consideration that a straight sized body might not have to do when measuring.
Let's get started!
The first thing you'll want to do is strip down to your undergarments! That, or find the closest fitting garments you own. A pair of leggings and a tank top will work, or even a bodysuit. We just need to be in something that hugs our figure closely so that we can get the most accurate measurements of our bodies as they currently are.
It's also really important to wear the same undergarments you intend to wear with your future me made item. This may mean that you need to take multiple measurements with yourself depending on how many different bras you might own! Each bra will effect your bust measurements, so it's important to know what your measurements are in each before starting a project!
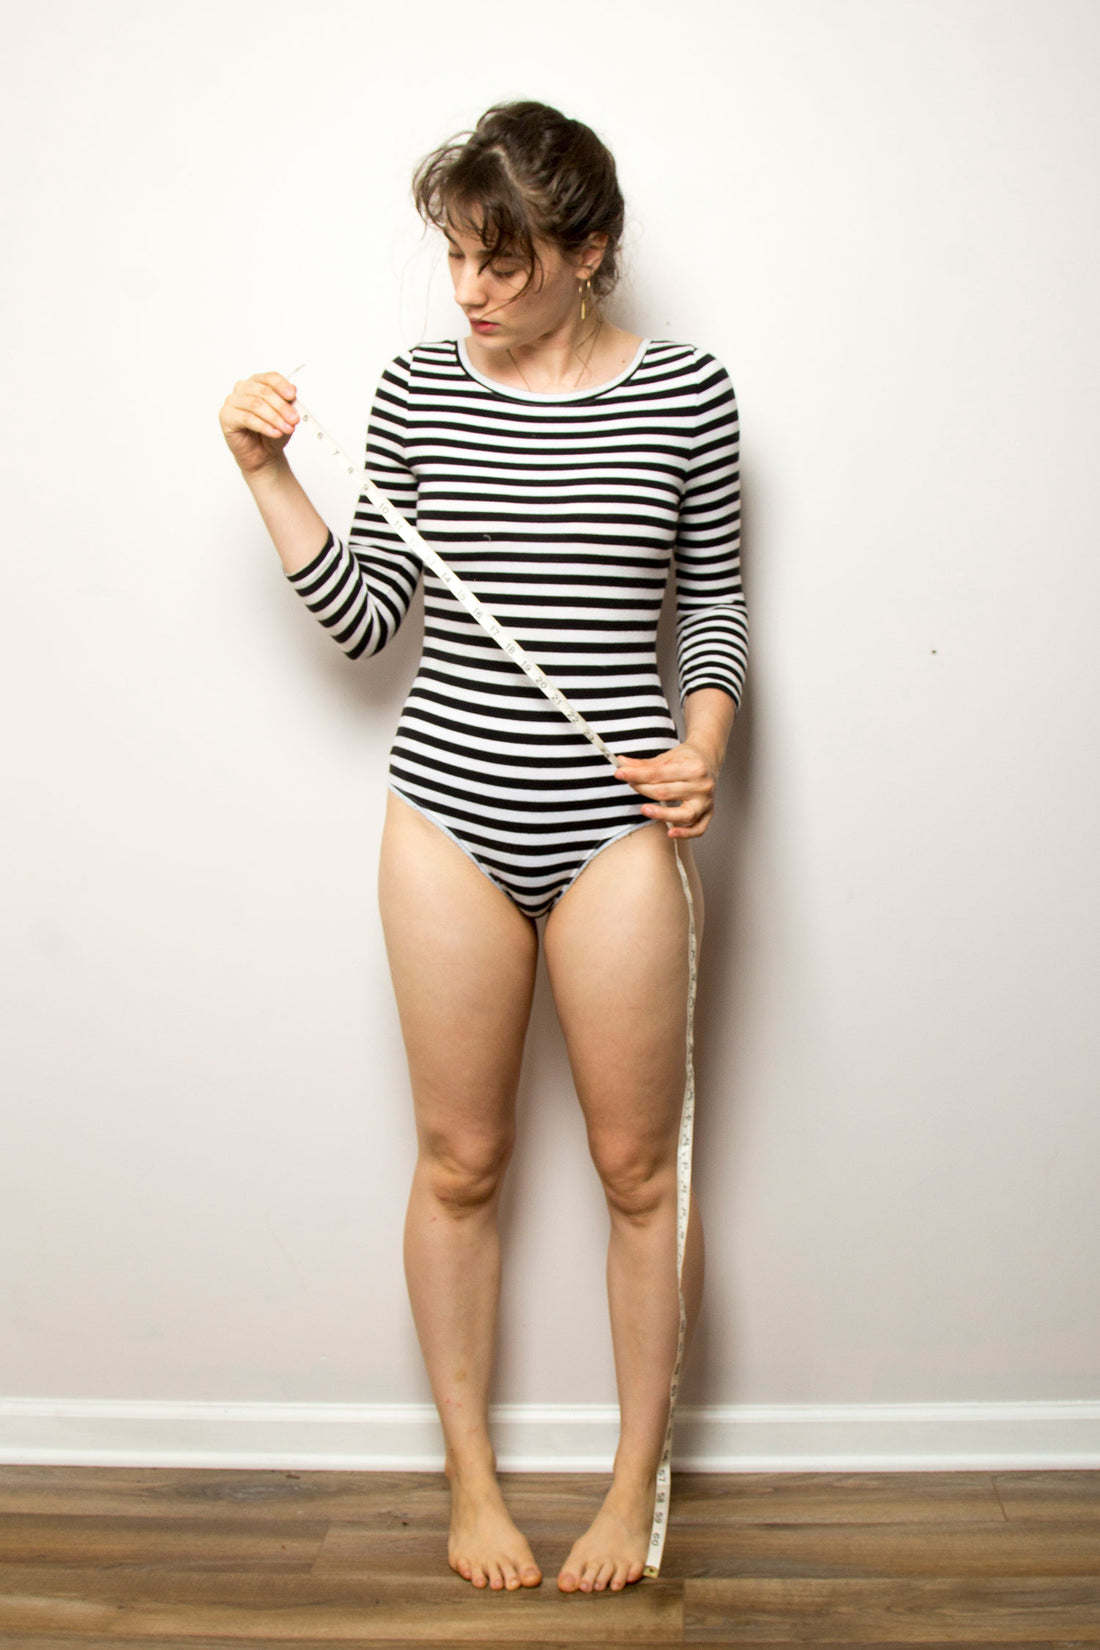
For this round of measuring, I slipped into my striped bodysuit. I found this to be a really good option because the stripes wound up helping me keep my measuring tape as parallel to the floor as possible (a feat I previously found incredibly difficult to manage on my own).

If you have a full length mirror, go ahead and set it up right in front of you. This will make taking your measurements (and seeing if your measuring tape is parallel to the floor) much easier! Let's grab our flexible measuring tapes, some paper and pens to note your measurements, and get to measuring!
BUST
I always start from the top of my body and work my way down. I'm not sure why I measure myself in such a way, but it's now become a habit.
Starting with our Full Bust , we will begin by placing our measuring tape parallel to the floor and wrapping it around our bust at its fullest point. Generally, this is right across our nipple line.

You'll want to take a nice deep breath in... and then exhale fully, making sure you keep your measuring tape in the same place, but loosening it as you exhale.

You'll notice throughout these instructions that I always have two fingers between myself and the measuring tape. I like to make sure that I can easily slip two fingers between the these spaces to ensure that my finished garment has enough wearing ease (from mybluprint.com: "Wearing ease is the amount added to a person’s body measurements so one can move in a garment") for my own personal comfort.
Everyone has a different level of ease that they wish to maintain in a garment, and it's a very individual decision. I'm not entirely sure when I realized that having two fingers of ease was my perfect comfort level, but I'm so glad I did because it has saved me a ton of tears over ill-fitted garments or garments that were just too tight.
Let's move on to our Upper Bust. This measurement is important in determining our cup size. One common misconception is that our Ready-to-wear bra cup sizes will be exactly the same as our sewing cup sizes, but that isn't always the case! Most patterns I have worked with calculate the cup size by taking the difference from the upper/high bust from the full bust measurement, whereas many RTW bras determine the cup size by taking the difference between the under/ low bust from the full bust measurement.
As always, it's important to read through your garment instructions fully to determine how the cup size was calculated. If you can;t find that information readily available, feel free to reach out to the pattern maker! Indie pattern designers are generally open and willing to send you any info that you might need to make your me made garments the best they can be!
To measure your Upper bust, slide your measuring tape just below your armpit. Your measuring tape will NOT be parallel to the floor for this step. Instead, it will have a slight angle to it as you wrap your tape around your body, under your arm, and over the smallest portion of your upper chest as shown below.


WAIST
Another common mistake (and this is one I made consistently in the beginning) is where to measure for your waist. Most patterns have a waist measurement that refers to your natural waist. What I didn't realize when I first started sewing is that the natural waist is NOT measured at your belly button. I'm not sure why so many of us think that our waist starts at our belly buttons, but that is not the case.
Luckily, your natural waist is really easy to find! It's not always the smallest part of your body (another common misconception), rather it is found by bending to one side or the other. When you do this, your natural waist will naturally (see what I did there!) crease. This is where you should be measuring yourself!

Wrap your tape measure around your newly discovered waist area. Don't forget to inahle/exhale deeply. This will especially help if you are ever making pants!


You may even find that you want to take your waist and hip measurements while sitting down. Depending on your body, you may spread a bit in your measurements as you sit vs. when you are standing, which can definitely effect the overall fit and comfort of your garments.
For more info on measuring yourself while sitting, Jenny of Cashmerette just posted this awesome tutorial!
HIPS
Another common mistake that I used to make and that I see others making when measuring is around the hips. When someone asks where your hips are located, generally we all will point right at our hip bones because that is what we were taught in school, right? These are our hip bones so naturally this must be where our hips are located.

Incorrect place to gather our hip measurement.
However, our hips are actually located where our thigh bone meets the pelvis. This translates into our hip measurement being located around the largest part of our bum.


This area is also the area where you are most likely to "spread" while sitting down, meaning that your measurements will grow a bit. I highly recommend slowly sitting with your tape measure around your hips and loosening it as you sit to get the most accurate measurement!
Now if you want your high hip measurement, that can be found by measuring around your hip bones. This measurement is generally good for low rise pants, or any garment that is meant to start lower than your natural waist!

"PROBLEM" AREAS
I don't even really want to call these "problem" areas (hence the quotation marks) because these measurements aren't really problems. For me, they are just areas of my body that typically need additional measuring as they don't generally match standard or conventional patterns. There is nothing inherently wrong with these parts of my body, I just always take extra care when working on a pattern in these areas to get the fit absolutely perfect!
And these measurements will change from person to person. For me, my legs and shoulders are my top two most heavily altered areas when it comes to patterns. I've got runner's legs, so when making pants, especially close fitted ones, I generally have to grade my patterns between 2-3 sizes to accommodate my thighs and calves. So I always have those measurements on hand to compare to my size chart !
For my thighs, I find the widest part and measure all around it. I try to flex it or sit while measuring to account for my leg's natural spread.
 It looks like I am squeezing my tape measure a bit here, but I promise I'm not! I think that's just the crease from my bum.
 It looks like I am squeezing my tape measure a bit here, but I promise I'm not! I think that's just the crease from my bum.
And then I do the same for my calf.

My second most altered area revolves around my shoulders. I have pretty wide set shoulders and typically try to stay away from sewing garments with sleeves just because it can be a pain to alter. However, on the rare occasion that I do sew something with sleeves, I like to have my cross shoulder & cross back measurements at the ready! This ensures that I have plenty of movement in my sleeves and am not feeling constrained by them.
For my cross shoulder, I line up my measuring tape from shoulder bone to shoulder bone. This is where a well fitted sleeve should hit.

For my cross back, I do the same exact thing, measuring from shoulder bone to shoulder bone.
MISCELLANEOUS
Now that we have the most common measurements written down and stored away for our sewing time we can either jump right into sewing up our newest garments OR we can take a few additional measurements that may come in handy in the future! I mean, we are already in our knickers- might as well breeze through a few more measurements!
I personally have found getting my bodice length measurements to be incredibly important. I have a longer than average torso which results in a lot of cropped garments if I don't make the necessary adjustments!
For this measurement, I'll need one for both the front bodice and back bodice. For the front bodice length, we will take our measuring tape and put it at our HPS (High Point Shoulder) which is located around the shoulder bone. Then, will will bring our measuring tape over the fullest point of our bust and down to our natural waist. It's important to include our bust in this measurement as the fullness of our breasts tends to lift bodice patterns up higher.

For the back bodice length, you will repeat these same steps, but you won't have a bust to contend with. So simply line your measuring tape up perpendicularly to the floor, starting at your HPS and ending at your natural waist.
Next let's take a look at our arms. Some common alterations include adjusting the bicep and length of sleeves. I know I am always having to add length to my sleeves since most of them come out bracelet length with no alterations!
First we will start with measuring our bicep. A common alteration to patterns is something called the Full Bicep Adjustment. This is where you go in and add fullness to your bicep for ease of movement without changing the sleeve cap. To measure your bicep, place your measuring tape under your arm near your armpit and wrap it around the widest part of your muscle. Feel free to flex if you'd like your finished garment to include enough room for a flexed arm.

For the sleeve length, this measurement really depends on where you would like your sleeve to eventually sit. What I like to do is jot down a few of my favorite sleeve styles (long sleeve, 3/4 sleeve, short sleeve, etc) and measure all of them in one go.
Place your measuring tape at your shoulder bone and run it down the center of your arm. Grab the other end of your measuring tape with your fingers and hold it taunt while you make note of each measurement you'd like to have tucked away for future use.

The last measurement I like to take is from my natural waist to the floor. This measurement is great to have on hand when working with skirts and sometimes pants. For pants, it's best to have both your inseam and outseam measurements as well, but if you don't have those, this is a good place to start!
While taking this measurement, I generally jot down a few extras as well, just as we did for our sleeve length. This way, I can pull from my full list whenever the mood strikes! I also will put on a variety of shoes when I am measuring the full length (from waist to floor) so that I know which measurements to use for which shoes!
Place your measuring tape on your natural waist and allow it to fall perpendicular to the floor. Gently step on the opposite end of the measuring tape until it is taunt. Record the measurements that you wish to have. For me, those include: Knee Length, Slightly above the knee, Tea Length, and Floor Length.
Generally, I have another person give me those measurements or I look in the mirror. The important thing to note while taking these measurements is that you should be standing up straight! If you bend over to look at your own measurements, you will more than likely alter the length inadvertently.

This might also be a set of measurements you want to take while sitting down as our garments tend to ride up a bit while seated.
Now there are plenty of other measurements we could take, but I think this is a good list to begin with, especially if you are just now starting out! As with anything, the measurements you wind up taking the most over time will be very personal to you, your sewing practice, and the types of garments you enjoy making! There are no right or wrongs as far as which measurements you should be taking.
If you never make pants, then it makes no sense to measure your inseam or around your ankle. As you develop your sewing practice, you will begin to notice different themes emerging and it will become second nature to gather your measurements accurately. :)
2 comments
Hi Marlene!
You are exactly right — it is such a personal decision, and even going skin tight you might want more room than you’d think for something that is “skin tight” because as a person, we move and breathe and our sizes fluctuate throughout the day!
However, there is another sewist (@winmichele on IG) who actually created a brilliant blog post all about minimum ease requirements that I love to reference whenever I am uncertain about where it is I should start: https://winmichele.wordpress.com/2019/08/29/minimum-ease-wearing-ease/
I think that her post will prove to be an incredibly helpful resource for you!
PS – I have sent you an email with all of this info as well :)
Thanks for these helpful tips. I’m trying to get better at doing alterations and want to learn the best ways of measuring myself.
It’s one thing to measure one’s own body and get those measurements. But if I’m taking in a pair of slacks, for instance, is there a rule of thumb as to how much extra room one should leave? I’m guessing you will say it’s personal. If one wants skin tight, seems easy. But if one wants a bit of room to move and breathe, then would 2" extra be enough?
Perhaps it would depend on the type of material. For instance, stretchy material might not need as much breathing space as fabric that holds.