

How excited are you that we have made it to the final step of creating your very own, bespoke bodysuit? After this, you will be able to walk all around town sporting your one-of-a-kind make!
I am so excited about the prospect of finishing that I even made myself some cookies for this occasion! Let's get started!
19) It’s time to insert your elastic onto your leg hole openings!
Grab your elastic piece and cut it in half.

Then, mark the halfway point on each elastic piece.


20) Line up the ends of your elastic with the crotch opening and pin your elastic to the wrong side of the leg openings right along the raw edge.

Then take your halfway point and pin it to the side seam of your bodysuit.
21) This is always a bit of a tricky step for me because you have to stretch your elastic while sewing along a curve, and also keeping your elastic near the raw edge of your fabric- eep!
So, go slow and don’t worry if your seam is a little wobbly- no one should be looking at it down there anyway!
Sew along the center of the elastic with a 4.0 wide zig-zag stitch, stretching your elastic as you sew.


Set your bodysuit aside for now while we tackle the crotch facing.
*OPTIONAL* If you would like extra support for your snaps, or you plan to use hammer-in snaps, you will want to interface your crotch facing on the wrong side of the fabric before ironing down the top edges.
By now I am sure most of you know that I prefer to use scrap material for my interfacing since it's more environmentally friendly to utilize an all natural material instead of purchasing new. If you wish to do the same, just grab a pre-washed piece of lightweight material and cut it out int he same shape as your crotch liner.

Then baste the liner & interfacing with wrong sides together all the way around the outer edges.

22) Fold your bodysuit crotch facings in by 1/2” (1.3 cm) along the top edges and press.
 If you have any little excess tabs you'd like to cut off after ironing your seam back, feel free to do so now!
 If you have any little excess tabs you'd like to cut off after ironing your seam back, feel free to do so now!
23) With RST, attach your crotch facings to the bodysuit at the crotch opening, making sure that you match up the front crotch facing to the front bodysuit and the back crotch facing to the back bodysuit. You’ll be able to tell which is which based on the notches.


24) Sew your crotch facings in using a straight stitch. Use a 1/2” (1.3 cm) seam allowance along the sides and a 1/2” (1.3 cm) seam allowance along the bottom opening.
 Whoops- it looks like I accidentally sewed a bit too far in on the right side of that crotch opening.

 Whoops- it looks like I accidentally sewed a bit too far in on the right side of that crotch opening.
25) Clip the corners of your facing and trim the seam allowance along the bottom edge.

26) Flip your facings to the right side and give your front and back crotch a good press (how odd to say!)


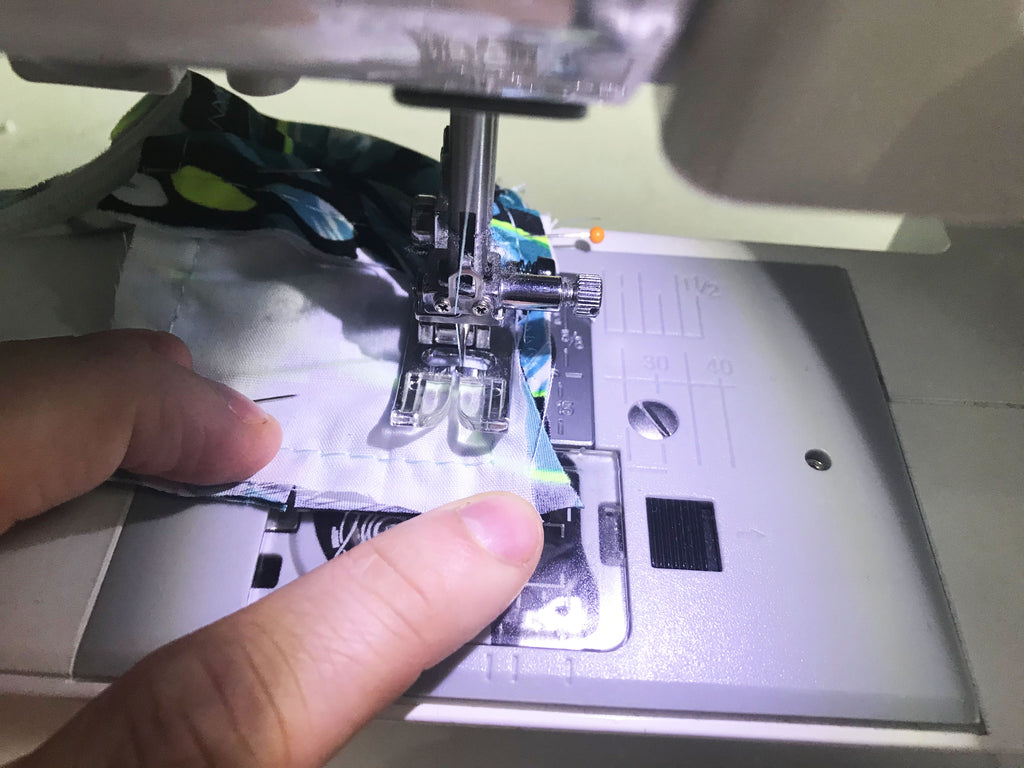
27) Now we are going to tackle cleaning up the leg openings and tacking down our crotch facings all in one go!
Using a zig-zag stitch, sew along the top folded edge of your facing.

Once you reach the point where you need to turn your project to continue sewing you will want to follow the below steps:
a) Put your needle all the way into the fabric and lift your foot up

b) Turn your entire project so that the next seam you need to sew is facing you

c) Put your foot back down and continue sewing.
Continue to follow along the leg opening, making sure the elastic has been turned and is folded under the raw edge.


You will again have to stretch as you sew to ensure that the elastic is lying flat. Continue all the way around until you wind up back to your first set of stitches.
 This is what the right side of your garment will look like- pretty nice,eh?
28) All that’s left is to sew in some snap closures along the crotch opening! I recommend at least three for maximum comfort and support.

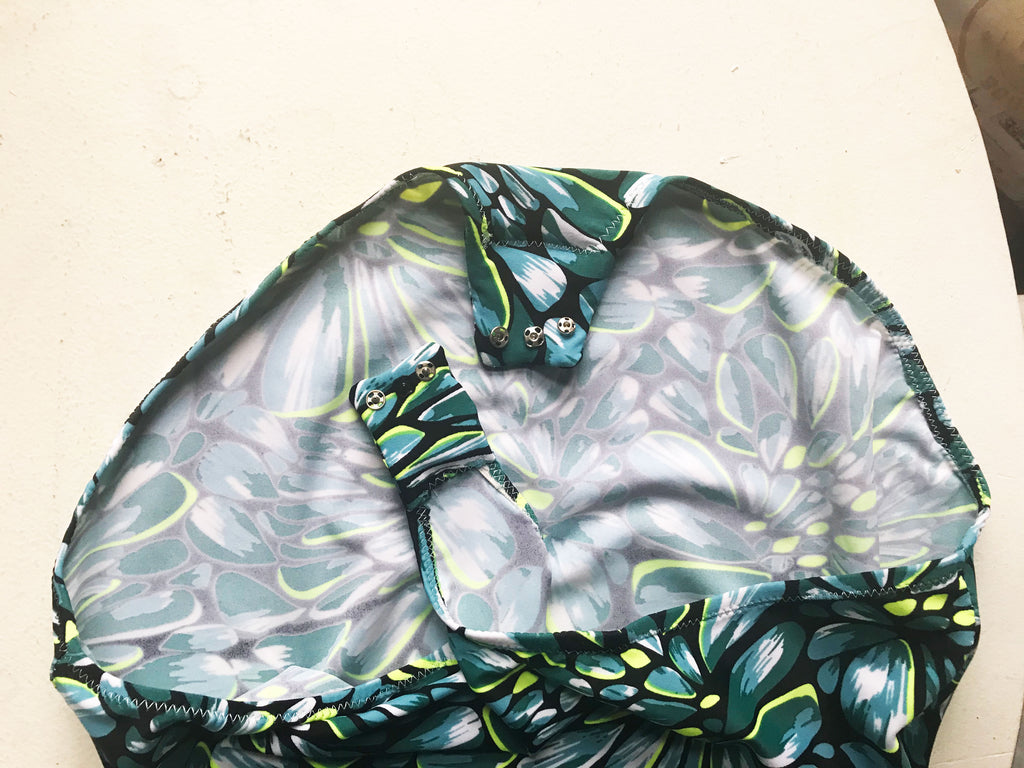 Don't mind my mismatched snaps- it's all I had available! Plus, no one should be checking those out anyways.

 Don't mind my mismatched snaps- it's all I had available! Plus, no one should be checking those out anyways.
YAY!! You are officially done with your Nathalie! I think it is time to show the world how awesome your new creation is!

