
I have a confession to make: Whenever I sew neckbands, I honestly wish I had like 5 arms and hands to help me get everything into place! And for the Nathalie, I really tried to make this process as easy as possible. I had shoulder seam notches for the neckband at one point, but through the testing process, I realized that depending on how much the fabric stretched, the notches might be perfect or wildly incorrect.
So, I hope you don't mind muddling though this not super tricky part, but wish-we-had-5-hands part with me.
9) With right sides together, attach your neckband to your neck opening, lining up all the raw edges, notches, & CB neck seam to your CB notch.

Your neckband will be slightly smaller than your neck opening, so use those notches as your guide when pinning it in place.
In order to get the right amount of stretch distributed throughout our neckline, I find it best to simply grab the CF & CB of my neckband & garment pieces and stretch the neckband until it fits around the front & back of the neckline.

Now this is the part where I always feel as if I need 5 hands. Instead, I will admit to you that I use my teeth to gently bite my fabric layers all together at the shoulder seam. I am then able to let go of the CF & CB of my neckline and pin that shoulder seam in place.
Then I repeat the same process for the other side.
 Sorry, there is no image of me actually biting my fabric- I only had two hands and neither could hold the camera!
 Sorry, there is no image of me actually biting my fabric- I only had two hands and neither could hold the camera!
I know, this probably sounds SUPER weird, but it is the way I have always done necklines and it has always worked out well for me! Plus, my fabric is always freshly laundered soooo....
If biting on your fabric sounds too weird, this is the part where you can ask someone for help, eyeball it, or simply work between the CF & CB pins you already have in place.
10) We are now going to sew your neckband to your neck opening. To do this, you can start at the CB of your garment. Sew a few zig-zag stitches to lock the neckband in place.

10a) Then, you are going to lightly stretch the neckband piece in between your pins as you sew to get it to lie flat against the neck opening. Try not to stretch your neck opening, only the neckband.

Voila! That wasn’t *too* challenging I hope!
OPTIONAL: If you have a tag, now is the time to add it to your garment, before we trim up our seams! Slide your tag just underneath your neckband seam allowance and tack it into place.
 Tag is from the ever lovely collection of Kylie & the Machine labels.
 Tag is from the ever lovely collection of Kylie & the Machine labels.

11) Trim your neck seam and press your seam allowance down towards the inside of your garment.


If you have a tag, make sure you don't accidentally cut it off, like I did!
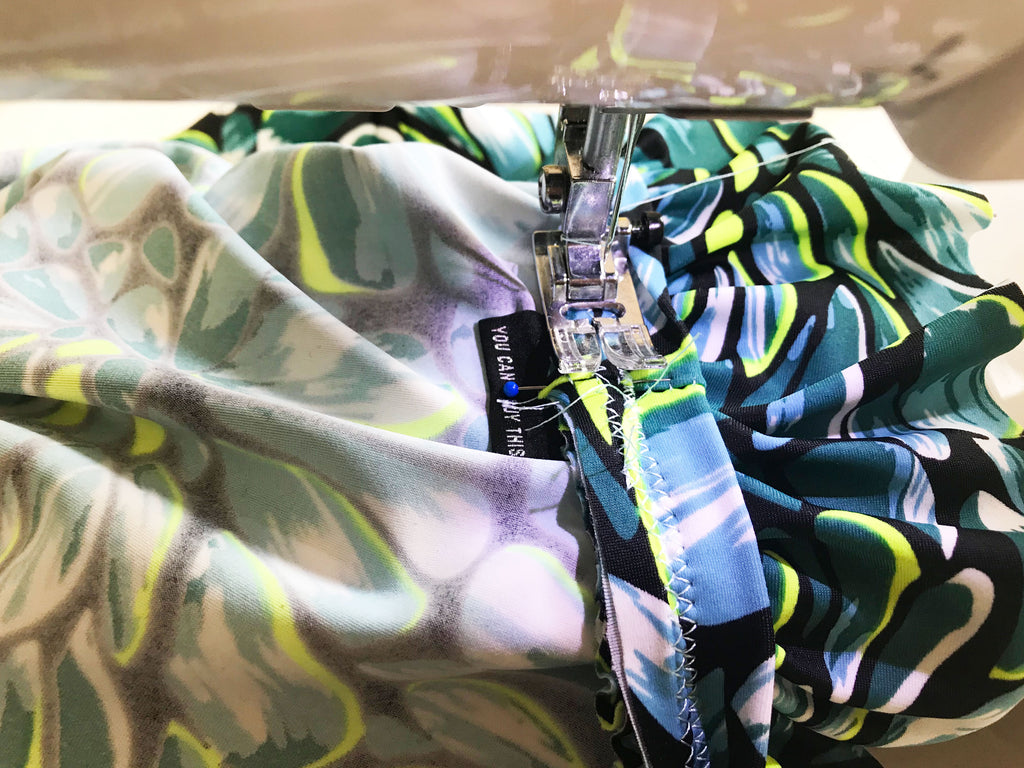
12) We are now going to embark on edge stitching our neckband down to add extra security as well as keep the seam allowance from popping up while we wear our garment.
This next part might seem a bit tricky, but there is no need to be afraid. Feel free to pause and grab a quick snack or a nice beverage. And of course stretch your legs if you’ve been sitting at your machine all day!
If you have no ruffle, this should be as easy as simply sewing a straight stitch about an 1/8” (0.3 cm) away from the seam line, catching your seam allowance on the back side of your garment in this stitch.

12a) If you have a ruffle, it gets a tad more complicated.
For our front neckline, simply sew about an 1/8” (0.3 cm) away from the seamline, catching your seam allowance on the back side of your garment in this stitch. Make sure to back tack at both shoulder seams.


12b) For our back neckline, this will be trickier as we have the ruffle piece in our way.
Pull the ruffle piece up and out of the way to access the underside of the back bodice.


From here, you will again sew 1/8” (0.3 cm) from the seam line.


Checking to make sure I haven't accidentally caught my neckband under my stitching...

And that my seam allowance is getting caught under my stitching...
Please note that you may not be able to get too far under the ruffle where it meets the shoulder seam and that is totally ok!
Whew, how do you feel? That part with the neckband was a bit...adventurous, wouldn't you say? I hope you are feeling super accomplished and proud of yourself! We are so so close to finishing! In fact, we only have two more parts to complete and then we will each have our very own rocking bodysuits!
Whenever you are ready, check out Part 4 - Sleeves and Side Seams.